
How to make a beat in Ableton Live 10 | Step by Step Tutorial (2022)
So you want to make a beat in Ableton Live 10? Here is a no-nonsense guide to making your first beat, from a beginners perspective, to simplify the whole process.
Over the last few years, Ableton has easily become one of the most popular, highly praised DAWs on the market.
Ableton is particularly popular with electronic and hip hop producers, due to it’s interchangeable session / arrangement view, and the speed and fluidity of its workflow.
It is incredibly innovative, ridiculously quick on it’s feet and has a fairly low learning curve. When used correctly, Ableton is capable of making any sound or track you could imagine.
Making a beat in Ableton: Before you begin
For a beginner, Ableton can seem very daunting and sometimes overwhelming. We’ve all been there.
In order to make a beat in Ableton, it’s important you have the following:
1. A full (or even the trial version) of Ableton
The “Standard” or “Suite” versions of Ableton are fairly expensive, and for a beginner this can be very off-putting.
But the “Intro” version comes with a fairly low price-tag (currently $99), and it definitely has what you need as a beginner to create full, complex beats.
So if you aren’t ready to pull the trigger on the more expensive versions, the “Intro” version will definitely give you what you need in the early days of your music production journey.
Here are the pricing options for Ableton:
| Ableton Version | Price |
|---|---|
| Intro: | $99 |
| Standard: | $499 |
| Suite: | $799 |
Ableton also has a free trial of the full Suite software, which lasts for 30 days.
Click here to download Ableton’s free trial.
2. A very basic understanding of the Ableton’s interface
As tempting as it might be to dive into beat-making head first, you need to have a very basic understanding of the functionality of Ableton first.
Make sure you understand where sounds, instruments and effects are stored and how to input them into your tracks. You should also make sure you know how to create a MIDI pattern for a virtual instrument, and how to add an effect to that instrument.
If you’re unsure, have a read of our full, free guide to the basics of Ableton.
This is me being honest with you – don’t try and run before you can walk. If you’re serious about making beats, learn your craft the right way.
3. Some samples/sounds to play around with.
In order to make original, professional-sounding beats, you’ll need some sounds, samples or even virtual instruments to input into Ableton.
Now this step isn’t essential. You can create music with the default sounds and presets in Ableton, but trust me it won’t sound great.
If you’re in the early days of production, I’m assuming you don’t want to be forking out a huge amount of money, if any, for samples and plugins right now.
Here is our HUGE list of FREE sample packs across a wide range of genres.
Or check out our guides to the best sample packs for genres such as Lofi, Hip Hop, House, Trap, etc.
Click here for our list of the 100 best FREE VST plugins of all time.
So now you should have a copy of Ableton, a few samples/sounds of your own, and a basic understanding of the program.
Now it’s time to get creative, and learn how to make a beat in Ableton Live 10.
For this guide, I have completely cleared my Ableton interface of folders, customisation etc., so that it should appear exactly how it would look the first time opening it.

How to make a beat in Ableton (2022 Tutorial)
Here are the 3 main steps to making a beat in Ableton:
3. Adding effects to your tracks
+ Summary / My best advice for workflow for beatmaking

1. Creating a drum beat
Regardless of the genre, the drums will be the foundation of your beat.
Drum patterns will usually be created and edited on a MIDI track.
Note: this guide will take place in the arrangement view of Ableton. It’s good practice to create clips and patterns within this view, although the session view can also be used. (Hit Tab to switch between the arrangement view and the session view).
Adding a drum kit
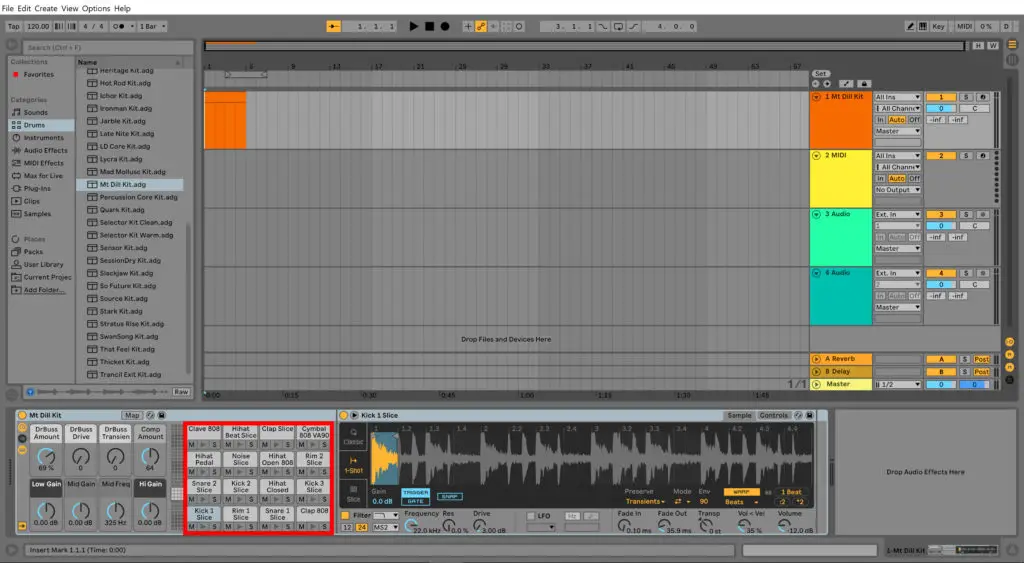
For now, the easiest way to demonstrate creating a drum pattern is to use a default Ableton drum kit. You can then easily import your own sounds into specific drum pads within the kit.
To import a default drum kit, navigate to the browser section > Drums > Drum Kits. You can then click the drum kits to hear a sample, find one you like the sound of, and then simply click and drag your chosen drum kit onto your MIDI track.
If you’re happy with this kit for now, and are not ready to import your own drum samples into Ableton, you can skip the next step (click here to scroll down).
Adding your own drum sounds to the drum kit
Importing your own sounds into Ableton is incredibly easy.
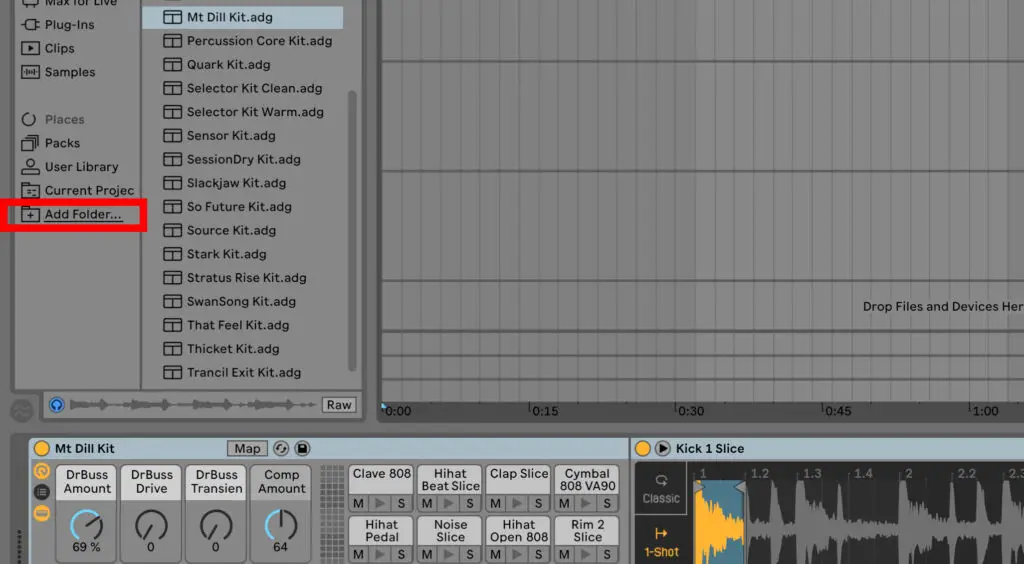
Near the bottom of the browser, you’ll see an “Add Folder…” option, click and navigate to the folder containing your samples.
Click OK and you’ll see the folder appear at the bottom of the browser list. You can then browse your chosen folder within the browser view.
To add a specific sound to the drum kit, simply click and drag a sound onto one of the drum pads in the bottom section of the screen.
Creating a MIDI drum pattern: Adding a MIDI clip
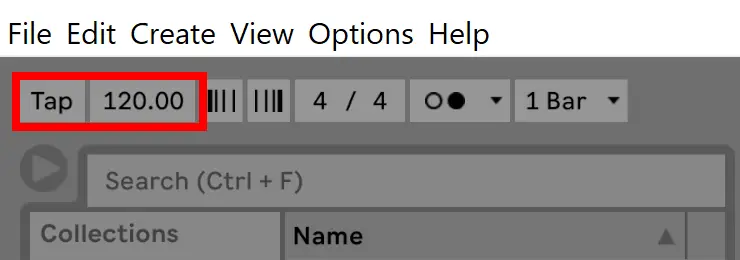
Before creating a drum pattern, make sure you choose a preferred tempo. Ableton has a fantastic feature (found in the very top left of the screen) that allows you to “tap” your tempo if you don’t know the BPM value.
The BPM is essentially the speed or tempo of your song, and has a huge impact on the feel, groove and style of a track.
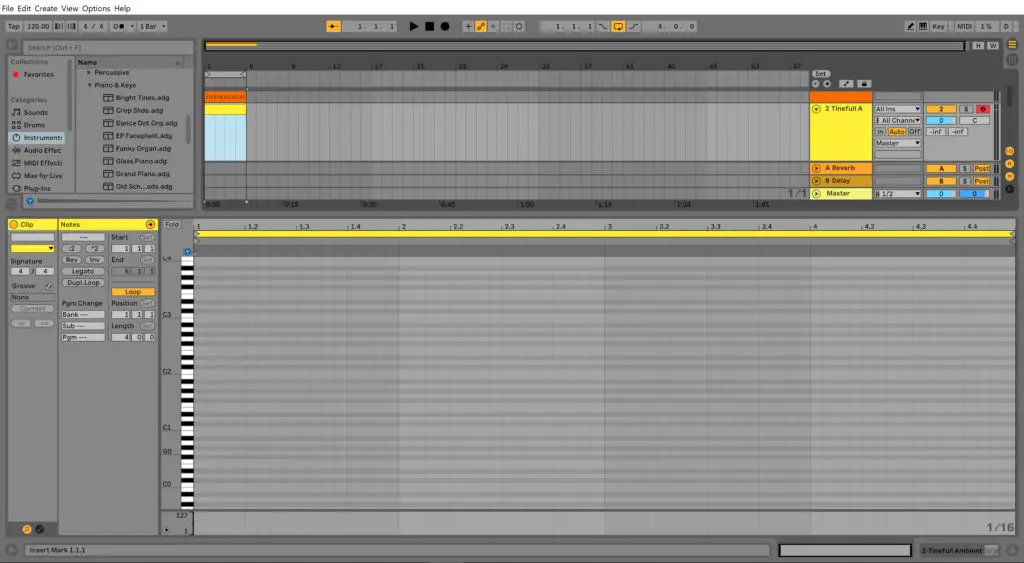
The first thing you need to do in order to create a MIDI drum pattern is create a MIDI clip.
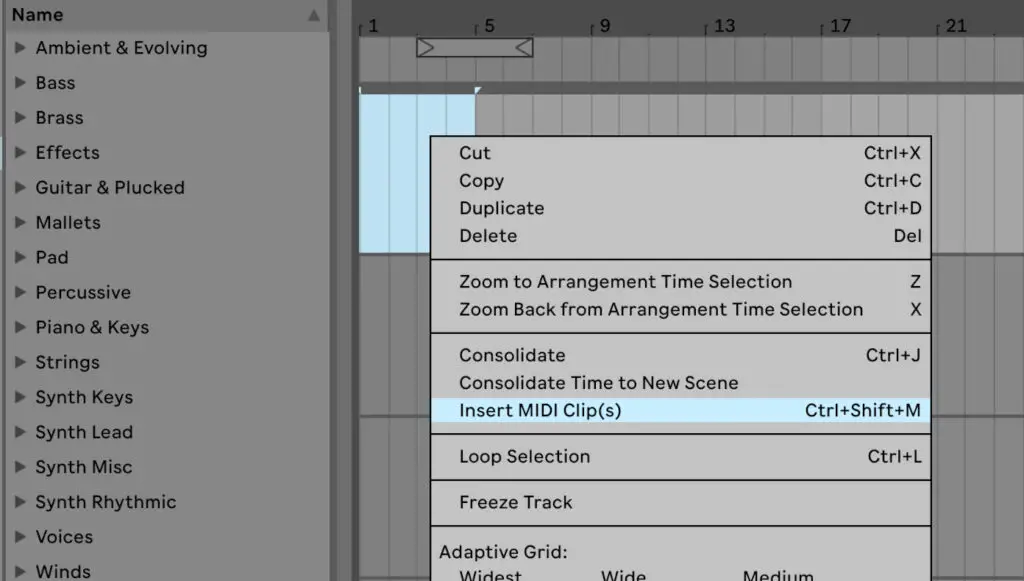
To do this, click and drag within the track display to however long you want the MIDI clip to be. In the above image I’ve selected 4 bars.
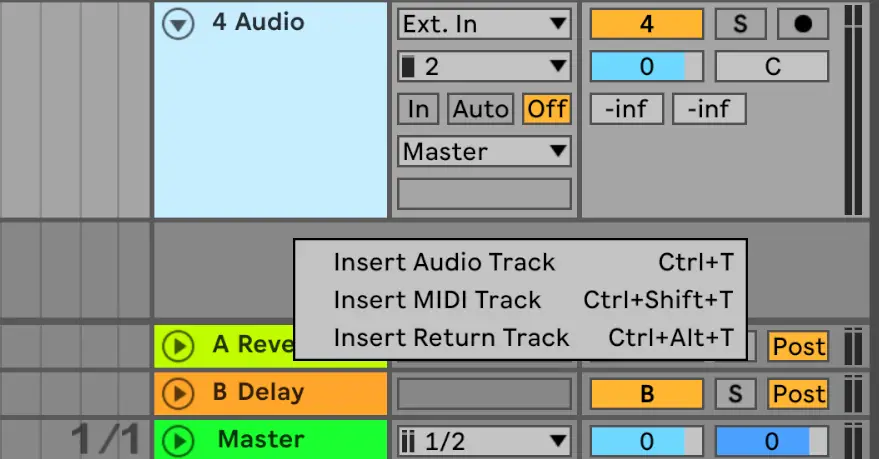
Then right-click and select Insert MIDI clip(s). This will transform your selection into a colored MIDI clip which you can now edit.
When the MIDI clip is created, a drum sequencer will pop up in the detail section at the bottom of the screen. This is where you can create your MIDI drum patterns.
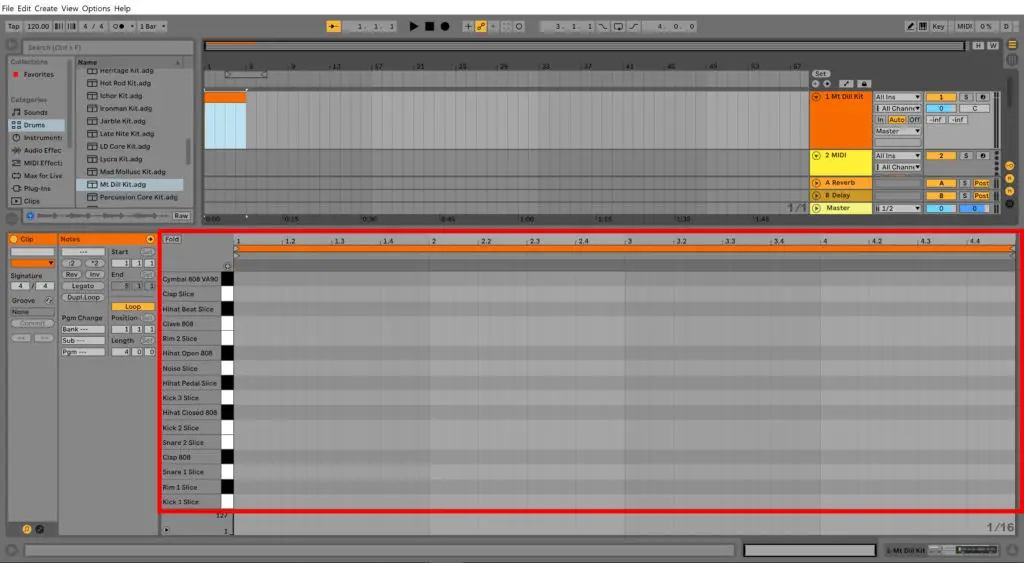
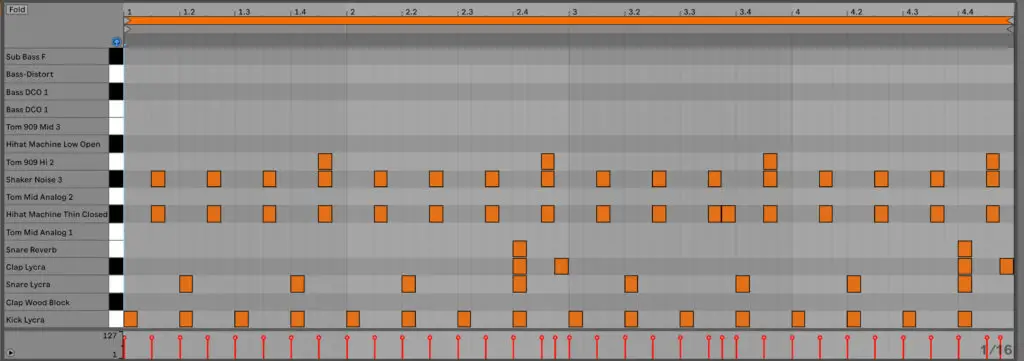
Creating a MIDI drum pattern
In the sequencer, you’ll see a grid-type layout, and down the left you have each sound in the drum kit. The length of the grid corresponds to the length of your chosen MIDI clip.

To draw in drum patterns, make sure the draw function is selected in the top right corner of the screen.
Ableton’s sequencer is extremely quick, powerful and intuitive. Whether you’re creating simple drum patterns or detailed, complex percussion sequences, the process is very straight-forward.
Simply click within the sequencer to create “hits”, click the hit again to delete it, and drag the edge of the hit to shorten or lengthen it.
Now is a good point to take some time to play around with the drum sequencer. Even if you’re a complete newbie to MIDI, you can play around and experiment with different patterns to create something cool.
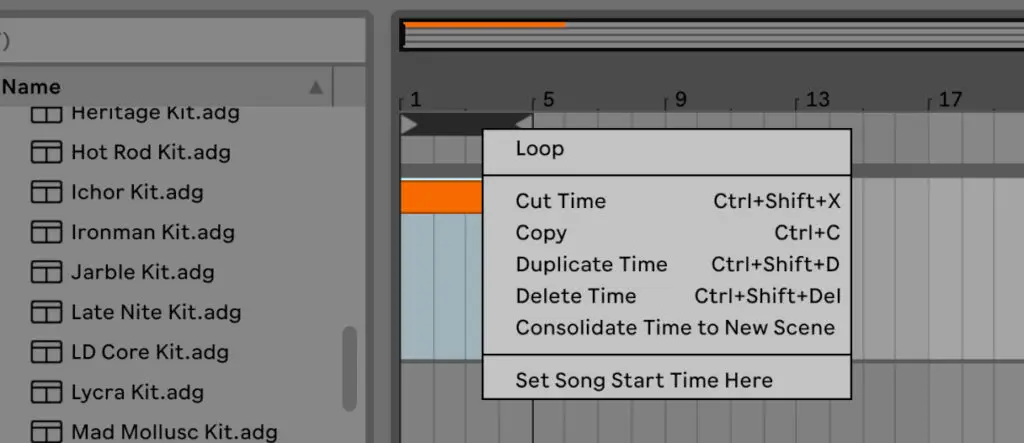
To loop your MIDI clip as you edit the drum sequence, drag the selection bar (shown below) so it contains your MIDI clip. Then right-click the bar and select Loop.
Here’s a basic house drum sequence I made earlier…
A couple tips for drum sequencing
– You don’t have use a 4 bar MIDI clip for drums, many producers will sequence 1 bar and repeat it within the track. Using this method you can then single out specific bars you want to have some drum variation.
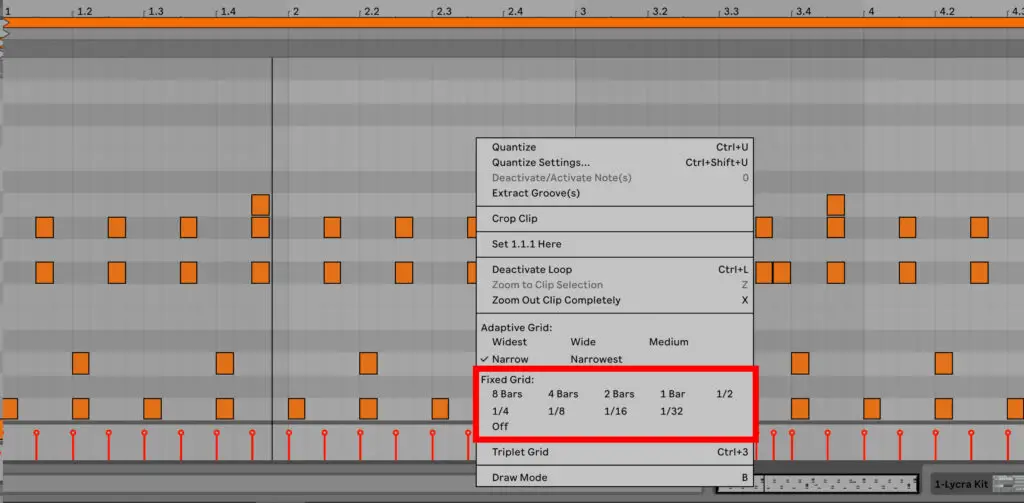
– If you right-click within the drum sequencer, there is a fixed grid section where you can choose to what beat your notes “snap” to.
For example: choosing the 1/16 option means the notes will “snap” to each 1/16 of a bar when placed or dragged.
– If you hold Alt while dragging or holding a note, it won’t snap to any beat so you can smoothly drag the note anywhere you like (very useful for offbeat, more realistic drums).
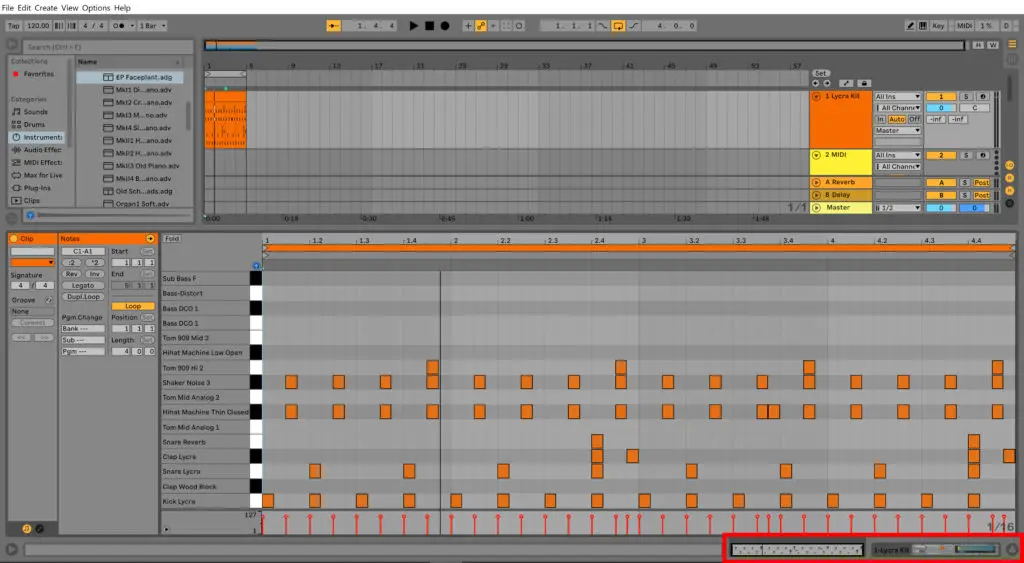
Switching between the drum kit view and the drum sequencer view
If you’re sequencing a drum pattern and want to change up one of the sounds, simply click the section highlighted above (left part) to navigate back to the drum kit view and add / edit your sounds.
Then click the section again (right part) to navigate back to the drum sequencer.
2. How to make a beat in Ableton: Adding a VST instrument
VST instruments are essentially plugins that generate audio and act as software-based instruments.
They often emulate recognizable sounds of famous synthesizers and other instruments. Luckily, Ableton Live 10 comes with some free, built-in, decent-sounding instruments and sounds to play around with.
To have a look through these default sounds, navigate to your browser categories (left hand panel), and browse the Sounds, Drums or Instruments categories.
Alternatively, you can input your own VST instruments. Click here to browse our top 100 FREE VST plugins of all time.
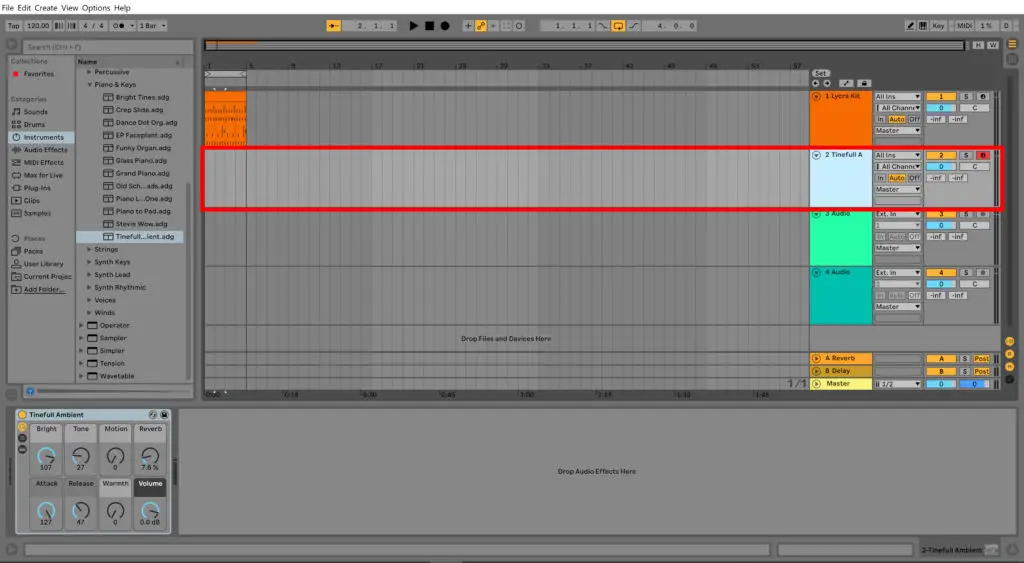
Once you have found your chosen sound or instrument in the Ableton browser, drag the instrument into a new MIDI track (not the same one as the drums!)
Creating a MIDI pattern: Adding a MIDI clip
Because you are creating a MIDI pattern, you need to select and create a MIDI clip (like you did for the drums).
To recap, click and drag within the track display to however long you want the MIDI clip to be. Then right-click and select Insert MIDI clip(s).
When the MIDI clip is created, a piano roll will pop up in the detail section at the bottom of the screen. This is where you can create your MIDI chords or melodies for your selected sound / instrument.
Creating a MIDI pattern: The Piano Roll
Now you have your created MIDI clip, navigate to the piano roll in the bottom section of the screen.
At the moment, the piano roll is probably a little thin to comfortably navigate. You can expand the piano roll area by dragging it up from the top to your preferred size.
Creating a MIDI sequence in the piano roll

Before trying to create any MIDI sequences, make sure the draw button is selected in the top right corner of Ableton.
Ableton’s piano roll is extremely quick, powerful and intuitive. Whether you’re creating simple melodies or detailed, complex chord progressions, the process is very straight-forward.
Simply click within the piano roll to create notes, click the note again to delete it, and drag the edge of the note to shorten or lengthen it.
Now is a good point to take some time to play around with the piano roll. Even if you’re a complete newbie to MIDI or music theory, you can play around and experiment with different patterns to create something cool.
Here’s a MIDI sequence I made earlier…
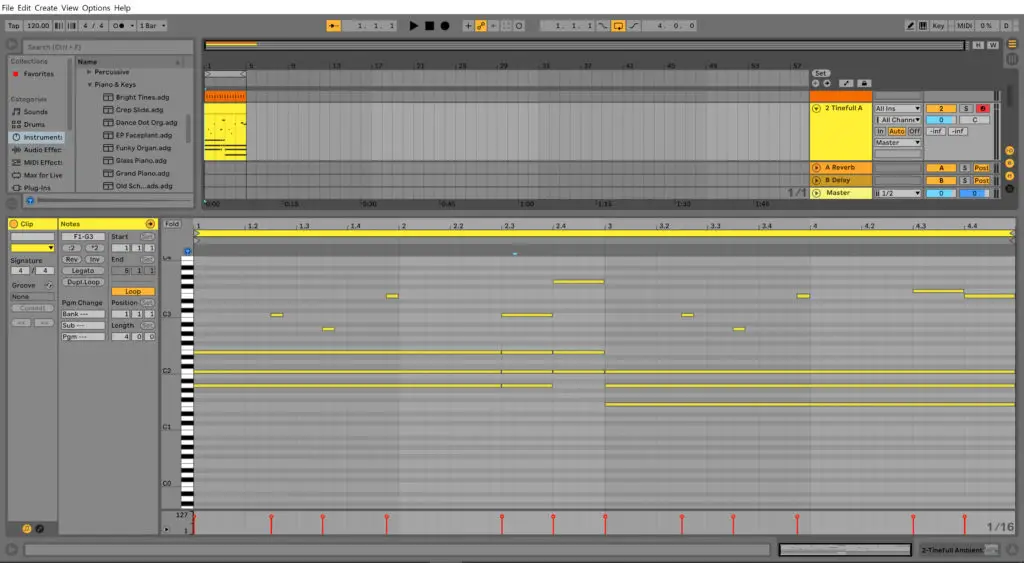
You’ll notice that when you input MIDI notes into your piano roll, they are reflected in the corresponding track view above. So now you should hear these notes during playback.
This process can be repeated as many times as you like with various instruments, just make sure each instrument is set to a specific track. Repeating this process will allow you to layer your track and create overlapping sounds and instruments.
Repeating a pattern
To re-size a MIDI clip, simply click and drag the edge of the MIDI clip in the arrangement view so that the MIDI clip only contains your inputted notes.
Then, to repeat / duplicate this pattern, right click and press Duplicate, or highlight the clip and press Ctrl + D. This will duplicate the MIDI clip sequentially along the track.
This technique can also be applied to your drum pattern channel, so you can duplicate drum patterns to correspond with your MIDI chords or melodies. This will eventually allow you to flesh out your beats into entire tracks.
3. How to make a beat in Ableton: Adding effects to your tracks
I’ve covered this in a previous guide, so some of this information you may already know, but it’s important we cover it here too.
Adding an effect can completely transform an instrument or sound. For example, even a reverb can transform something dull and ordinary into an interesting, spacious, reverberating sound.
The process of adding effects on Ableton is extremely easy and intuitive. Ableton comes with a wide selection of built-in effects such as EQ’s, reverbs, delays, flangers, vocoders, pedals and many many more.
However there are a huge amount of third-party VST effect plugins you can find on the web. Click here for our list of the best 100 FREE VST effects and instruments of all time.

Choosing an effect
To choose an effect, navigate to the browser (section on the left-hand side of screen), and into the category Audio Effects.
Here you will find countless effects, each with various labelled effect presets.
Choose an effect / preset you like the sound of, and simply drag it into your chosen track. This will bring up a effect editor in the bottom detail section of the screen in which you can edit and manipulate your chosen effect to your hearts desire.
For this guide, I’ll be adding the reverb preset: “Cathedral”.

Editing an effect
As you can see, the reverb editor window has appeared in the bottom detail section of the screen.
The effect editor interface will largely depend on what effect you’ve added to your sound.
The editor will have various buttons, knobs and modulation controls to manipulate the effect in any way you like.
For example, in the reverb editor, you have buttons such as:
– Decay Time: This determines how long the reverb tail lasts for.
– Density: This controls whether you want a dense sounding reverb or a thinner one.
There’s so many built-in Ableton effects to choose from, each with an impressive range of presets and editable controls. Have a browse with various effects, and try adding some to instruments and sounds and see what you can come up with.
Rinse and repeat…
At this point, you have: a drum beat, a MIDI element playing over the drums, and an effect applied to the MIDI pattern.
These processes can be duplicated to your hearts content.
Repeat Step 2 (adding a VST instruments) on new MIDI channels to add elements such as bass, pads, piano, synths, and countless other VST instruments and sounds.
Repeat Step 3 (adding an effect) to add effects such as compression, reverb, delay, filters, EQ and many, many more.
The possibilities are endless.
Summary / General Thoughts
At this point, you’re either feeling one of two things: inspired or completely confused.
Hopefully it’s the first, but if you’re feeling overwhelmed right now, you are not alone. It took me forever to really get the hang of Ableton, even after several years of experience with multiple other DAWs.
The key here is patience, and a committed, focused attitude to learning and understanding this incredible program. I cannot stress this enough: you will not master this program overnight. Not even close.
To summarise…
Start with drums and percussion. Experiment with various kick and snare patterns, and play around with interesting hi hat and percussion sequences. If you find yourself grooving along with the drum pattern, follow that idea and build on it.
Create a tonne of drum pattern ideas, and get used to the mechanics of creating and building great drum loops.
Browse our huge list of free sample packs for some FREE sonic inspiration across all music genres.
Once you have this process down, adding VST instrument patterns should be your main focus. If you’re completely stuck on where to start with MIDI patterns, start with a bass-line. Usually, bass-lines don’t include chords and consist of one repeating melody, so it’s a great starting point for beginners.
Now you have some decent drum loops and a bass-line. The next step relies on time and patience. Add some synth melodies or some basic piano chords over your drums and bass-line. If the drums are the skeleton of your beat, this is where you add the heart and soul.
The final step (adding effects) is such as an essential and vast part of production it could never be fully covered in one guide. Compression alone can take years to fully master, and that’s just the tip of the iceberg.
As illustrated above, start with reverb. Unlike compression, it’s relatively easy to make reverb sound good. Reverb usually sounds best on mid/high range sounds, such as pads, synths, keys, snares etc.
Adding effects holds the key to an incredible level of creativity and innovation. Experiment with filters, echos, flangers etc, to manipulate your sounds in weird and wonderful ways.
And there you have it. The basics of how to make a beat in Ableton Live 10.
One of the biggest pieces of advice I give to beginner producers is one step at a time. Don’t get ahead of yourself. There’s no point diving into sound design or complex automation clips when you don’t even know how to use the piano roll.
So get to work, put the hours in, and start creating your masterpieces.
Good luck!