
Sytrus Tutorial – How to use Sytrus like a PRO in FL Studio 20
Sytrus is an incredibly powerful, versatile VST synth available as a stock plugin with FL Studio 20.
It’s arguably one of the most well-known, but least understood stock plugins in FL Studio. Sytrus is a relatively complex plugin, capable of creating an unimaginable amount of sounds, including strings, pads, leads, basslines, ambient FX, guitars and much, much more.
For beginners, this stock plugin can seem a little intimidating at first. If you have no prior experience with VST synths or sound design, you may find yourself a little overwhelmed by the plugins various sliders, knobs and grids.
Thankfully, this incredible synth is not as confusing as it looks, and with a little guidance it becomes a lot more intuitive to create and manipulate your own original sounds.
In this full Sytrus tutorial, we’ll look at how to generate and shape sounds, as well as adding filters and effects to the sounds. Enjoy!
Sytrus Tutorial | FL Studio 20 Guide
The Top Panels
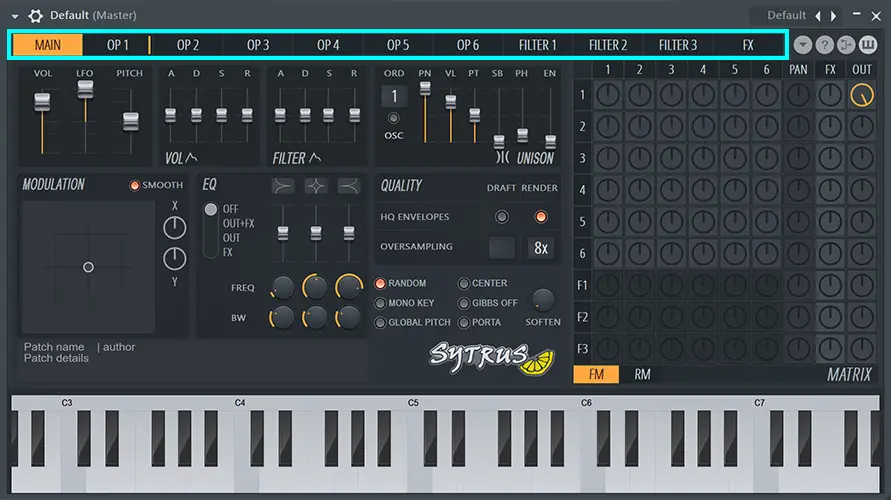
Firstly, let’s take a look at the most important parts of the plugins interface.
Sytrus is laid out in separate panels that you can select along the top of the interface: Main, OP (1-6), Filter (1-3) and FX.
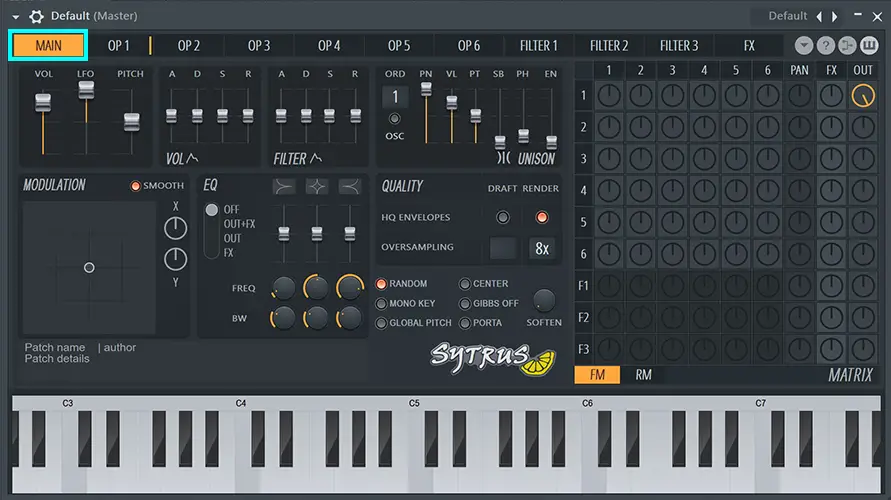
Main
The main section of the plugin has the master controls and main parameters that affect the entire sound. This includes unison controls, master modulation, oversampling options, EQ and master pitch.
Operators
The 6 “OP”s or Operators can essentially be viewed as oscillators, that can be controlled and edited individually. In these tabs you can shape the waveform of the sound using various parameters, as well as sculpt the envelope, LFO and more.
Filters
The filters can be used to shape the frequency of the operators. All 6 operators can be routed to any of the 3 filters.
FX
This panel contains various effects to finalise your sound, including reverb, delay and chorus.

The Operators: Main Controls
I think it makes sense to start with the operators panels, to look at how to generate some basic sounds.
So make sure “OP 1” is selected in the top panel menu. If you press a key on the lower keyboard, you’ll hear a basic sine wave. This is the most common sonic starting point for most VST synths.

In the very top corner of the operator panel, you’ll see a visual representation of the waveform. Just next to the waveform you’ll see various sliders; SH, TN, SK, SN, FL and NS.
These controls allow you to shape the waveform in many unique and creative ways. For example, the first slider “SH” will scroll through the most common waveforms; sine, triangle, saw, square or a combination.
The other sliders will sculpt, skew and warp the wave in various, interesting ways. This allows you to create your own original sound to further edit within Sytrus.
There are a couple more important controls in the upper operator section that you should be aware of.
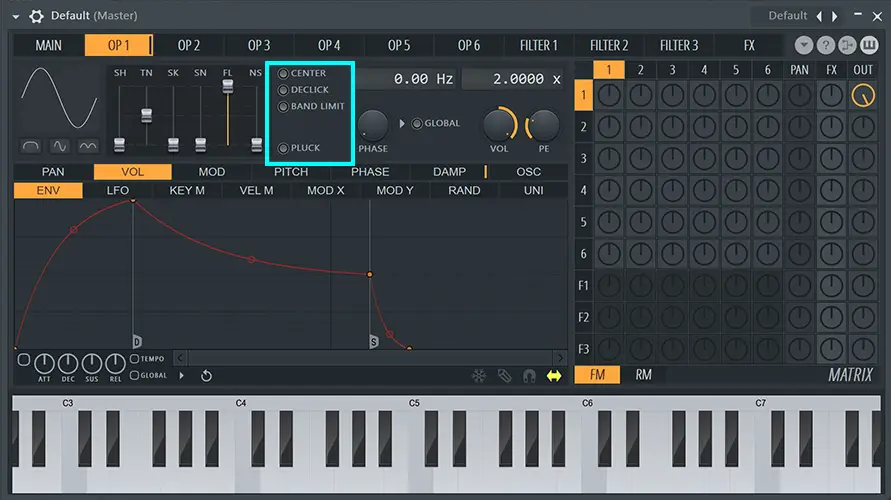
Declick
As the name suggests, this will remove any substantial clicks from the beginning of the sound.
Pluck
This option will shape the sound so it’s more of a shorter, “plucked” sound, as opposed to a sound with a longer duration.
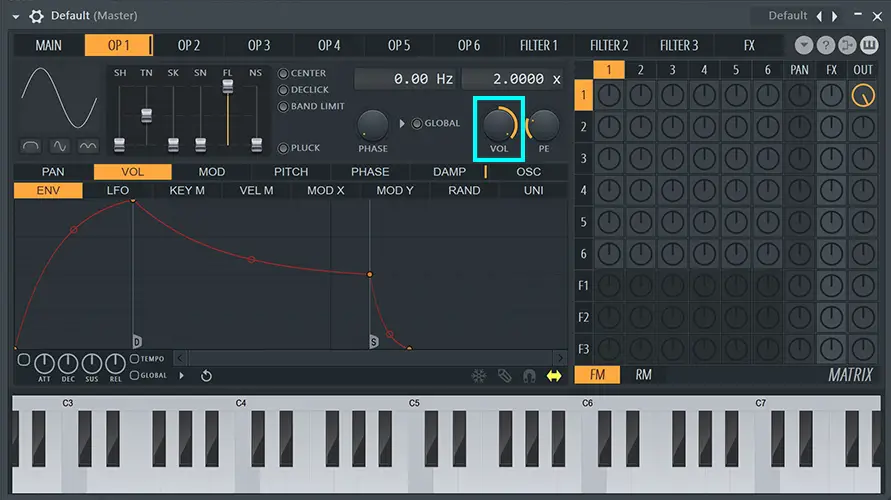
Volume
This is your main gain control for your selected operator.
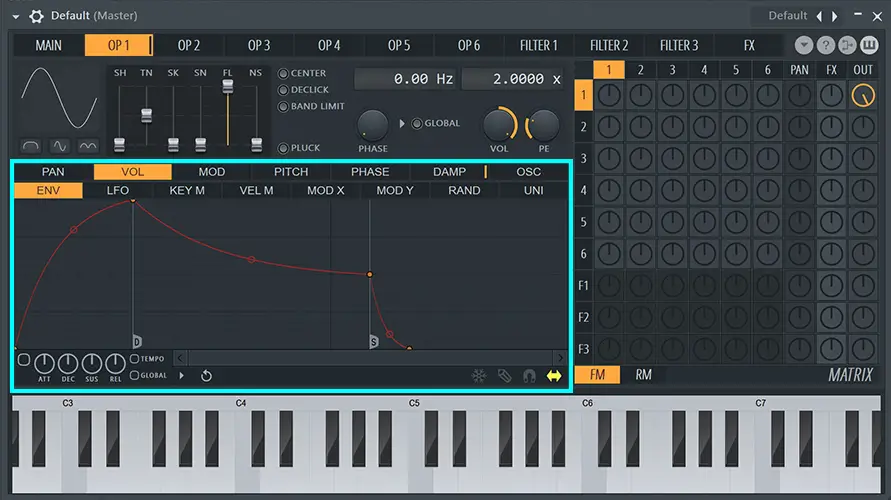
The Operators: Envelopes and LFO’s
Each operator provides further sonic flexibility in the form of various envelopes, LFO’s and modulation options.
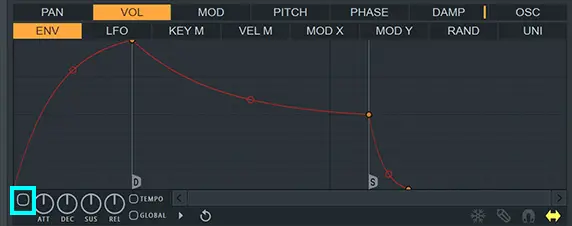
By default, all these lower controls are inactive. For example, to turn on an envelope (or other control), click this small button in the bottom left of the envelope section.
Along the top of this section are two rows of options.
The top row (PAN, VOL, MOD etc) can be used to select what parameter you want to control, the bottom row (ENV, LFO etc) determines how this value is affected.
For example, if you select Vol (top row) and Env (bottom row), you can use the envelope to control the volume of the operator.
This opens up a huge amount of creative versatility. You can use a combination of these parameters to affect the sound in countless, highly unique ways.
For example, you can add an LFO pattern to the pitch or phase of the sound, or modulation patterns to volume, pan or even to the modulations themselves.
At this point, have a play around with these features on a single operator. Make sure you are comfortable with creating ADSR curves and LFO patterns to a sound before moving on.
So, you may have noticed that by default, only one operator is functional. To activate more operators, we need to use the Sytrus Matrix.
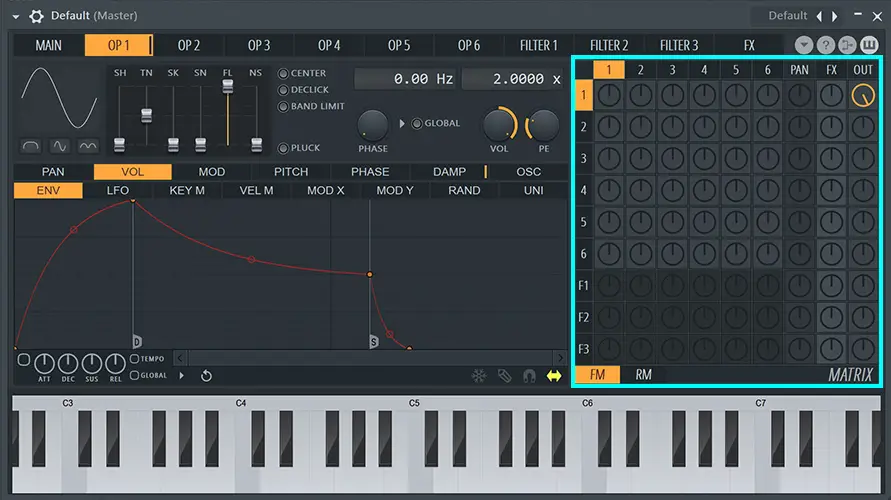
Sytrus Tutorial: The Matrix
This section of the Sytrus interface can be quite confusing if you’ve never used a synth matrix before, and it can trip a lot of beginners up.
By using the matrix you are essentially telling Sytrus which operators you want to be turned on, and what filters / FX you want to route them through.
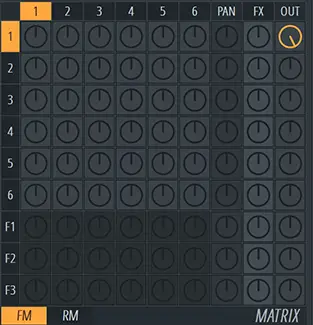
To use a basic example, this is how the matrix will look by default. With this configuration, only one operator is active, and it is being routed directly to the output signal. Therefore, no matter how many FX or filters you add, the operator will sound exactly the same.

Here is what the matrix would look like with operator 1, 2 and 3 active. If you look at the numbers down the side of the matrix, the Out column for 1, 2, 3 is turned on. Therefore, we will hear operators 1, 2 and 3.
However, using this configuration we STILL won’t hear the filters or FX.
Okay, pretty simple so far. But let’s say we want 1 active operator to be affected by filter 1.
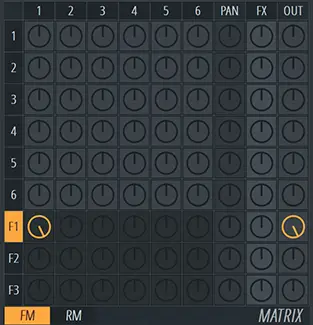
This is how you route the operator through filter 1. In essence, the sound is being sent to the filter, which is then being sent “across” the matrix to the output.
However, the above configuration would mean that operator 1 is being routed directly to the output, AND through the filter. So we would hear the sound twice; once with no filters and one with filter 1 added.
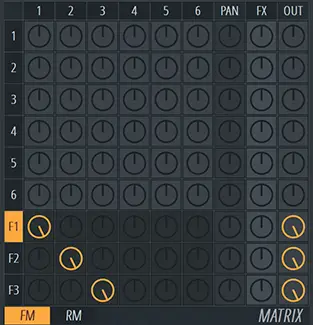
So, what about the above configuration? This means that all three operators are turned on, with operator 1 going through filter 1, operator 2 going through filter 2 and operator 3 going through filter 3.
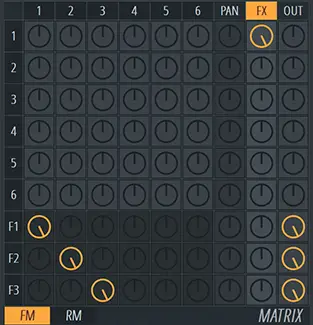
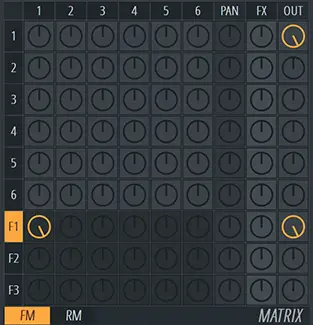
This is the last configuration I want to show you, I promise. This final setup results in the exact same sounds as above, however operator 1 is being routed to the FX, so you can add reverb, chorus, delay etc to each operator individually.
If you are feeling overwhelmed at this point, that is completely understandable. A synth matrix can be quite overwhelming at first, but with practice it start to make much more sense.
Try experimenting with the matrix yourself, and try setting up multiple operators to run through the filters and effects. At this point it makes sense to take a look at the Sytrus filters in more detail.
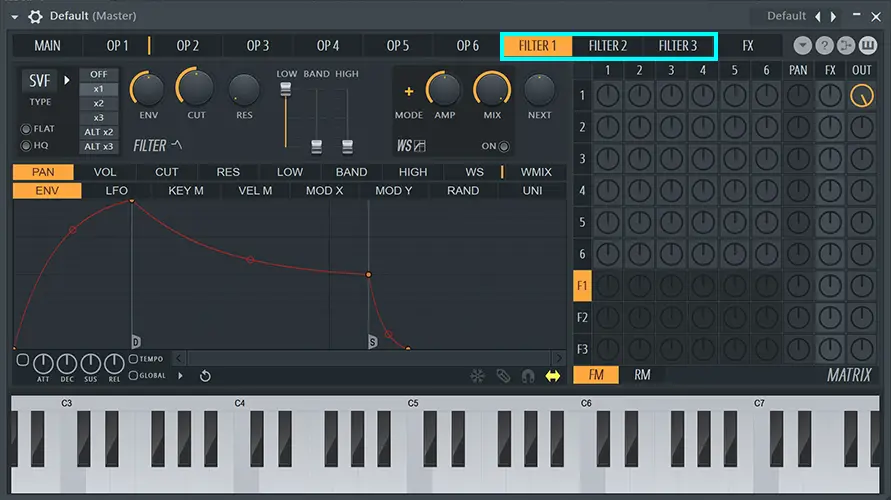
Sytrus Tutorial: The Filters
Adding filters to your chosen operators is a great way to shape the frequency response of your final sound. They can be used to finetune and subtly change the tone, or to completely transform the existing sound.
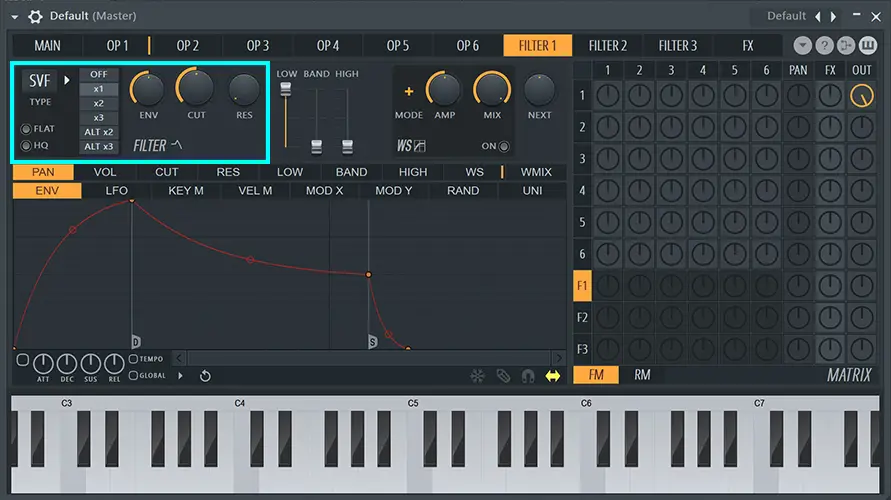
In the top left of the Sytrus filter panel, you’ll see a button that says SVF. By right-clicking you can choose your filter type, including numerous high-passes, low-passes, band passes and other less common filter curves.
Just next to this option, you can choose between; OFF, x1, x2, x3 etc. This options determines the steepness of the filter slope.
To the right of this option you have your standard envelope, cutoff and resonance options. By default these controls are static, meaning they won’t react to the sounds operator, they just add a “flat” filter to the entire incoming signal.
Adding an “active” filter
In order to tell Sytrus we want the filter to react to the incoming sounds, we need to turn on one of the lower sections of the filter panel.
For example, let’s say we want to add an envelope curve to the cutoff parameter, meaning the frequency cutoff of the sound will follow a specified ADSR pattern.
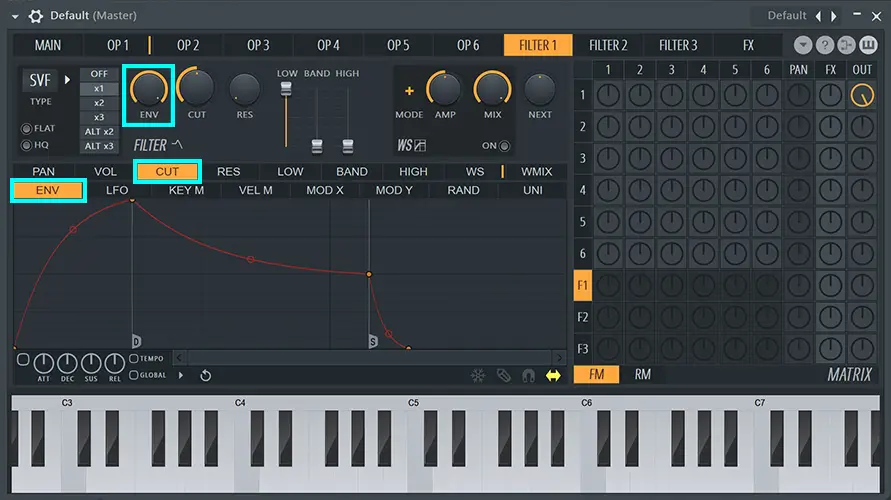
To do this, turn the ENV control of your filter all the way up.
Then select CUT and ENV (shown above) and turn the filter envelope ON.
Now you can edit the cutoff envelope ADSR curve for the sound. This means the filter is no longer static, and the cutoff is actually responding to the notes as they are played.
Hopefully by now you’re realised the sheer amount of creative possibilities Sytrus offers. Not only can you shape the envelope of the filter cutoff, you can edit the LFO, modulation, keymapping (so higher/lower notes are affected differently), unison etc. You can add any of the these shapes to the volume, cutoff, resonance and other filter parameters as well.
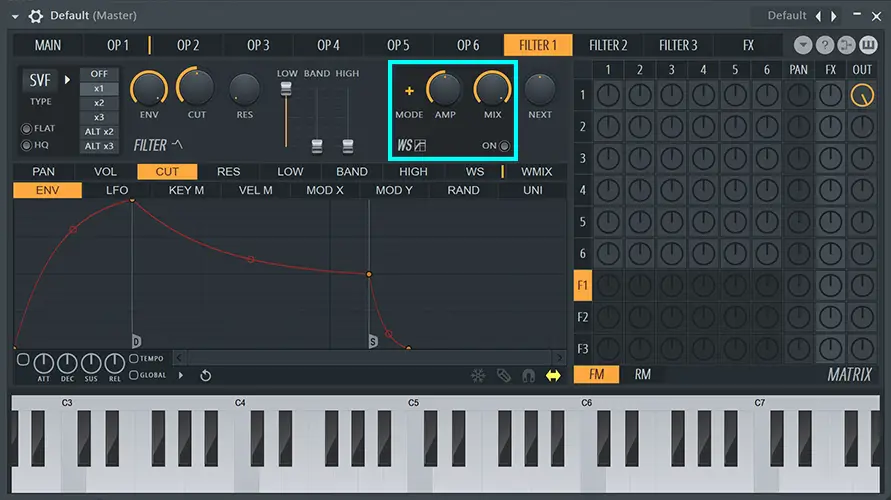
The final section of the filter panel I want to point out is the this small WS section. When turned on, this is a great way to add distortion / saturation to the filter using AMP and MIX controls.
And remember, in order to hear the filter, it MUST be routed up properly in the Sytrus Matrix (see above section).
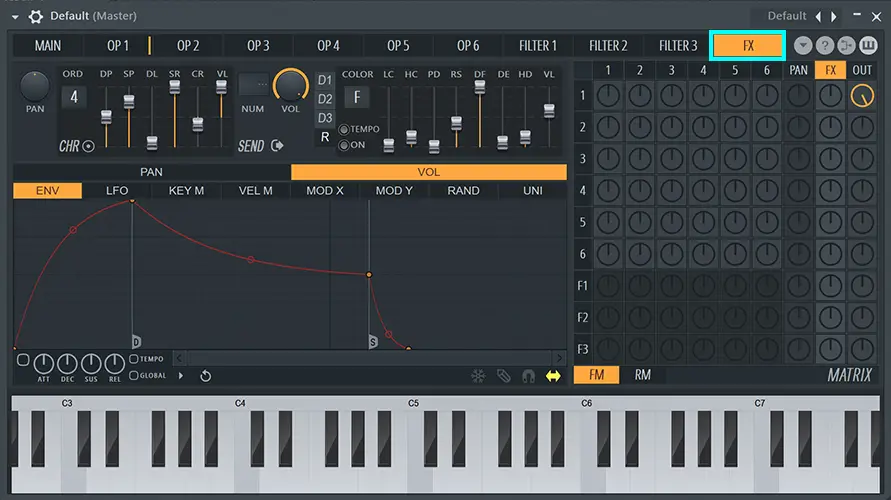
Sytrus Tutorial: FX
The Sytrus FX panel can be used to add chorus, delay or reverb to your operators to add the finishing touches to your sound.
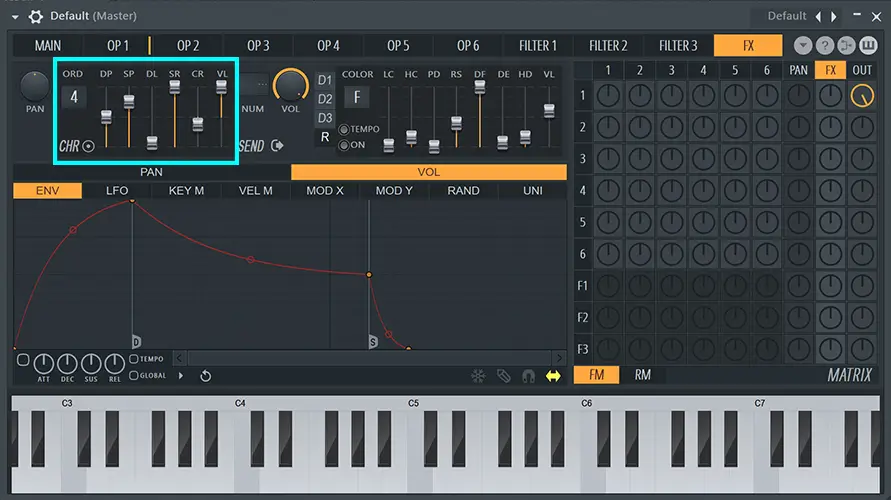
Chorus
To add chorus to your sound, change the ORD (order) parameter from 0 to alter the amount of chorus voices being played. From there, you can edit the standard chorus parameters (speed/SP, depth/DP, delay/DL, spread/SR etc) to create your own chorus effect.
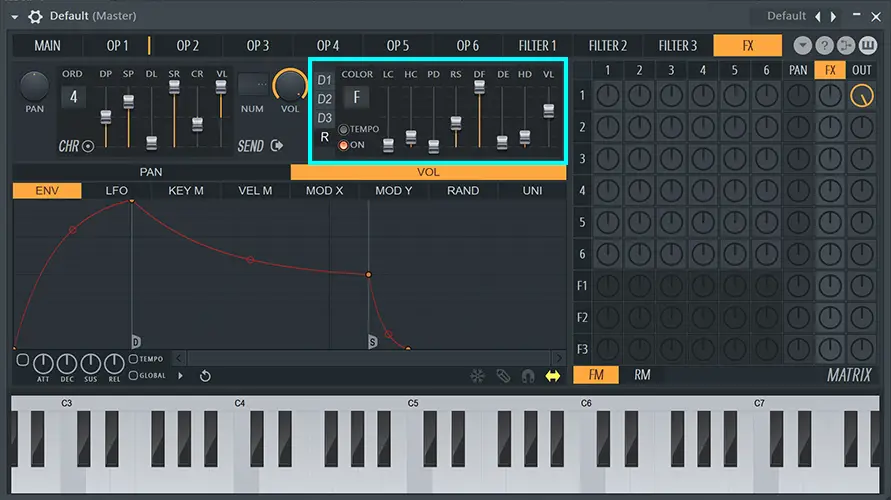
Reverb
To add reverb to your sound, navigate to this R module, and make sure the ON button is selected. Here, you can use various reverb controls (pre-delay/PD, room size/RS, diffusion/DF, decay/DE) to shape your reverb response.
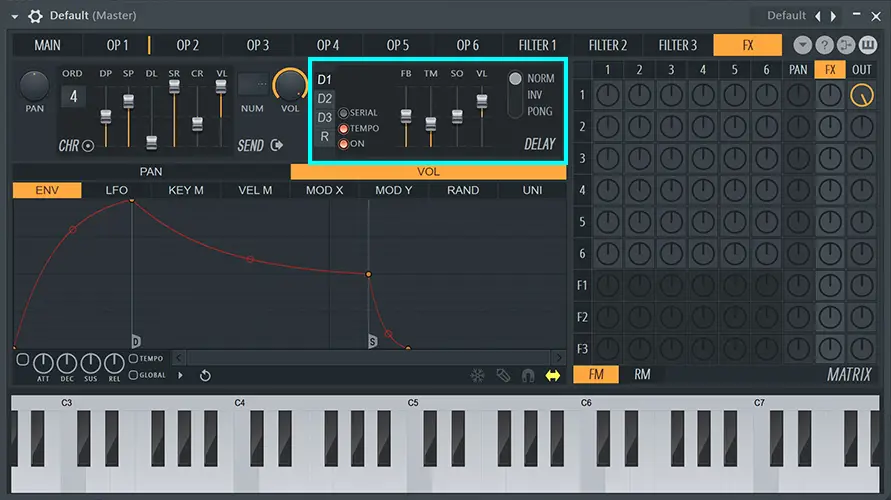
Delay
To add delay to your sound, navigate to these D1, D2, D3 modules, and make sure at least 1 is turned on (you can add up to three delays). In this module, you can edit the feedback/FB, delay time/TM and other delay settings.
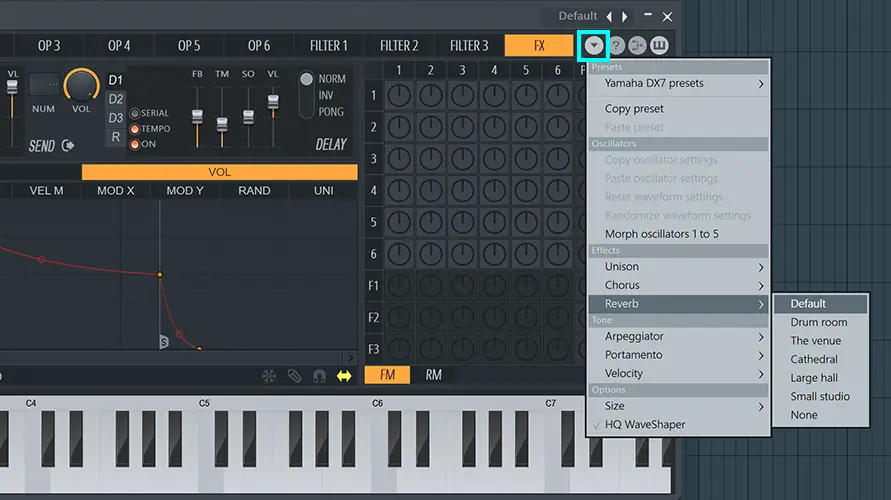
FX presets
Sytrus offers a decent selection of chorus and reverb presets to instantly add a specific effect to your sound. Just navigate to the arrow as shown above, and select an effect preset from the drop-down menu.
Sytrus: The Main Panel
The final part of this Sytrus tutorial is the main panel. In this panel you can control the master settings for your sound, including the operators, filters and FX.
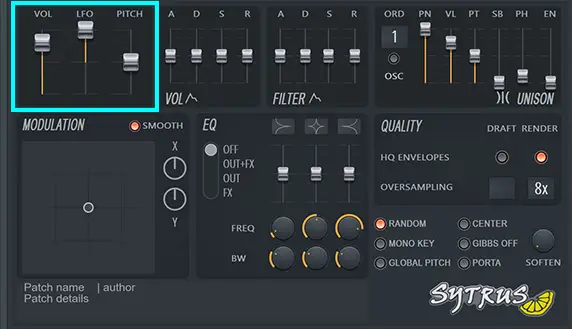
In this box, you can control the master volume, the total amount that any LFO’s are affecting the final sound (giving an easy way to instantly turn off all the LFO’s in Sytrus) and master pitch.
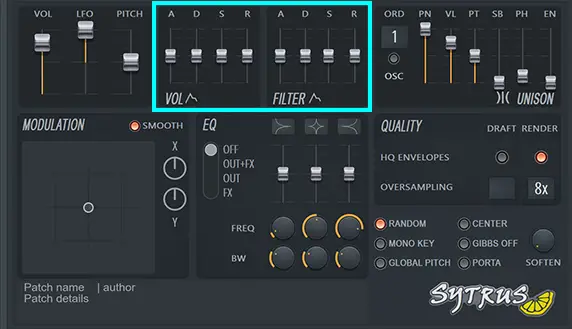
In these boxes you have ADSR controls for your master volume and for all your filters.
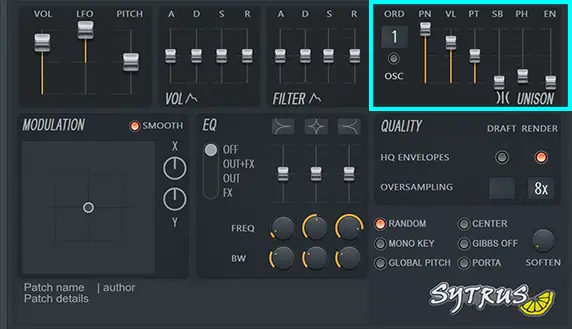
Here you can increase the unison of the entire sound. This is incredibly important for creating a full, more spacious sound. To increase the main unison value, simply drag the ORD parameter to a value of your choice.
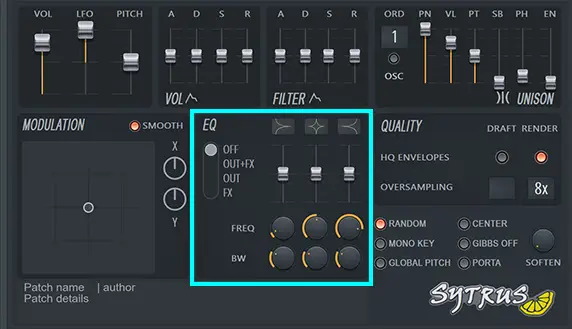
This section gives you a fairly rudimentary selection of EQ options. These controls are useful for experimentation within the Sytrus module, but I’d recommend using other EQ plugins to perfect your final EQ treatment of the sound.
How to Use Sytrus: Conclusion
Sytrus is a beautifully designed, incredibly powerful synthesizer capable of creating an imaginable amount of sounds and effects.
Many producers dismiss Sytrus as “just another stock plugin”, but in opinion Sytrus is a dark horse, and very underrated when it comes to free FL Studio stock VST’s.
Hopefully you got some value out of this Sytrus tutorial, and now understand the core concepts of sound design in Sytrus.
As always, practice makes perfect. It’s important to experiment by creating your own sounds from scratch so you can use trial and error to warp and manipulate some unique patches of your own.
Good luck!

Sytrus Tutorial: Similar Articles
How to use Serum (For Beginners) | 2021 VST Plugin Tutorial
How to make a beat in FL Studio | Step by Step Guide (2021)
The 8 Best FREE VST Synth Plugins (2021)
How to use Massive (For Beginners) | 2021 VST Plugin Tutorial