
How to use Serum (For Beginners) | 2022 VST Plugin Tutorial

If you mention wavetable synthesis around most producers, the first name you’ll probably hear is Native Instruments’ Massive, the hugely popular VST instrument capable of an enormous scope of electronic sounds. This heavyweight soft synth was the leading wavetable plugin, and for many years nothing else even came close.
Then Xfer Records released Serum.
Serum is a stunningly versatile, highly creative wavetable synthesizer with an uncompromising workflow and a truly high-quality sound. It is the answer to every beginner producer’s cry for help, being capable of creating virtually any sound imaginable while also being very easy to use and understand.
Personally, Serum is one of my all-time favourite wavetable synth plugins.
If you’re looking to learn how to use Serum, this tutorial will show you the most important components of the plugin, from a beginner’s perspective. We’ll break down and dissect these key elements, so you can get to grips with the power and sonic possibilities of this incredible plugin. Enjoy!
How to use Serum (2022 Tutorial): Jump to…
Osc Tab: Miscellaneous Controls
How To Use Serum (For Beginners)
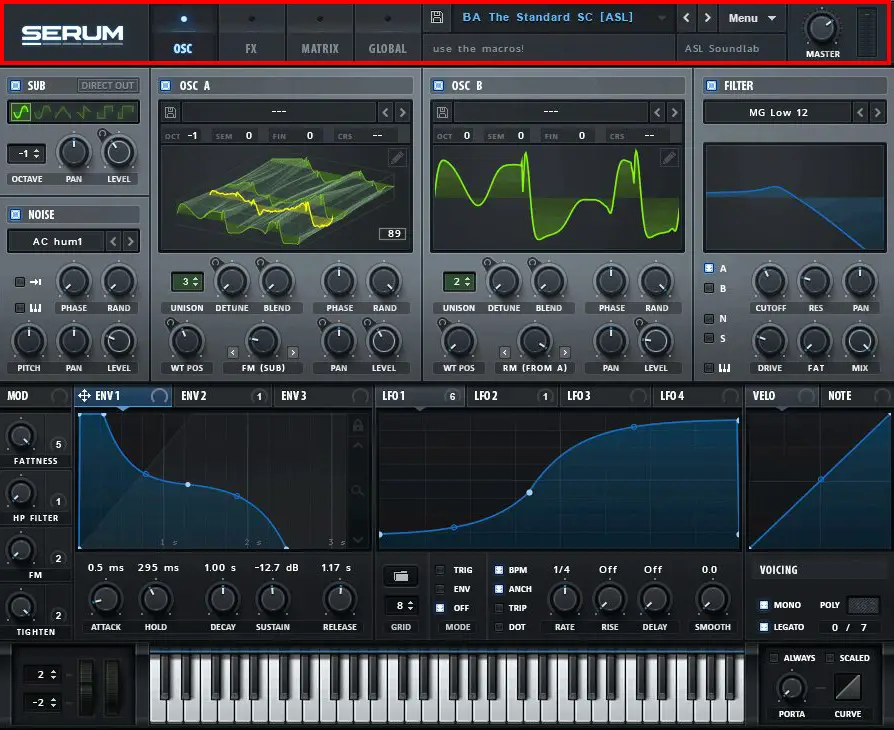
The Toolbar
Let’s start by taking a look at the key options in the top horizontal toolbar. This section contains various tools and preset options to help you get started.

Firstly, the four boxes on the left hand side let you navigate between the 4 main windows of Serum; Oscillators, Effects, the Matrix view, and Global parameters. You’ll be using these options fairly frequently, but you’ll spend the majority of your time in the OSC tab.
Moving along the toolbar, you’ll notice a few preset options. The “Save” / floppy disk icon allows you to save a particular sound you’ve been working on as a preset in your documents. You can then access these presets, as well as Serum’s default preset folders, through the drop down menu just to the right. I recommend exploring these presets before beginning the process of sound creation, as this will give you an indication of the vast range of sounds Serum can create.
The Menu option contains various miscellaneous options and settings. You probably won’t need much of this when learning the plugin.
Finally, you have a master volume knob to the very right hand side of the toolbar. There is also a handy volume meter, so keep an eye on this to avoid harsh resonances or unwanted clipping.

Oscillators A and B
To view and edit Serum’s oscillators, make sure the “Osc” tab is selected in the top toolbar.
Next, go to the top menu, and select “Init Preset”. This is the default, unedited state of Serum, and is the most basic sound you can get. This will be your starting point for creating sounds from scratch. To hear Serum’s sound, add a note to your piano roll or sequencer in your DAW in the loaded plugins MIDI track.
Serum is based on 2 main oscillators, oscillator A and oscillator B. Oscillators are essentially sound generators, and the sound they generate is based on a wavetable.
To select a wavetable for one of Serum’s oscillators, click on the “Default” bar above the oscillator module. This will bring up a ton of wavetable presets, categorized into; Analog, Digital, Spectral, User and Vowel. Have a browse through these wavetable presets, ranging from fat, analog saws to huge synth “growls” or “screams”. Notice the distinct change to the visualizer, reflecting the wavetable form of the sound.
One of the standout features of Serum is the ability to import and manipulate your own wavetables, but let’s not try run before we can walk – let’s first take a closer look at Serum’s oscillator parameters.
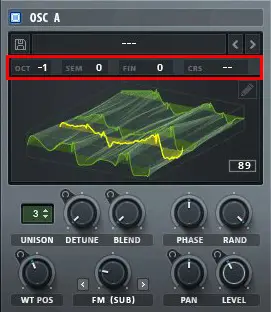
Along the top of the oscillator module, you’ll see your standard Oct (octave), Sem (Semitone) and Fin (finetuning). These are just separate options for defining the pitch of the wavetable, with varying degrees of precision.
Things start to get really interesting when we take a look at the parameters below the wavetable visualizer.
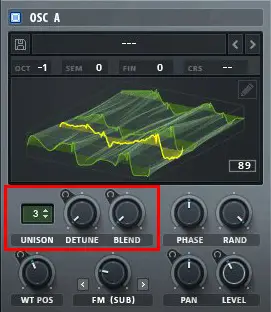
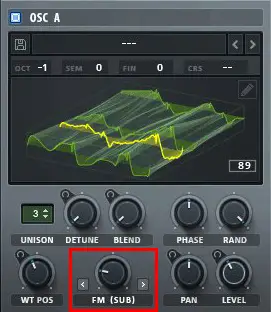
Unison options
The first three values (shown above) are unison parameters. Unison is where you stack very similar versions of the same sound to “thicken” the end result, not dissimilar to a chorus effect.
The first numerical “Unison” option lets you choose how many layered sounds you want.
“Detune” slightly detunes each of the layered sounds, further thickening and widening the sound.
The “Blend” option defines how much the unison voices stand out against your original wavetable.
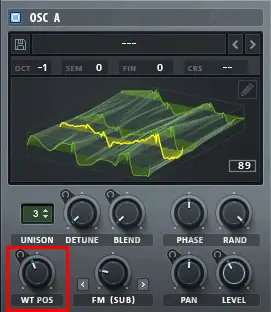
WT Pos
Serum allows you to smoothly scroll through the positioning of a selected wavetable using the “WT POS” knob, editing the tone and timbre of the sound. To help visualize this process, click within the wavetable and you can see a 3D representation of the sound, and note how the Wavetable Position knob “scrolls” through the wavetable.
This control can completely transform the selected sound depending on the composition of the wavetable.
Warp Options
The Warp knob is arguably one of the most powerful parameters within the oscillator module. This knob takes your sounds, and further bends, warps and manipulates them in various weird and wonderful ways. Each option in the drop down menu has a unique approach to warping the wavetable, and I highly recommend playing around with these options as they come incredibly useful in sound design and creating sounds from scratch in Serum.
One warp option worth mentioning is the Remap option. When selected, a pencil tool will appear next to the Remap knob. If you click into the pencil view, an editable mapping window will pop up. Here you can create you own shapes and warping patterns, and the Warp knob will bend the waveform depending on your custom shape.
Further Oscillator controls
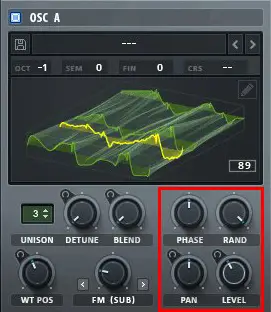
The Phase knob determines the position of the wavetable the sound actually starts playing. The Random knob allows Serum to play the wavetable from a random point within a specified section. The effect of these two parameters is usually quite minimal, but they are great for finetuning and adding a bit of character to a sound.
The Pan knob can be used to send your sound to the left or the right, and the Level knob is a standard volume control.
This is essentially the main module of Serum where you will synthesise your own unique sounds. As I said before, there are two distinct oscillators that work in an almost identical way. Each oscillator can be turned on or off using the small square button next to the “OSC A / OSC B” title.
Make sure you have a play around and experiment with the oscillator controls so you’re comfortable with this section before getting to grips with the rest of the Serum interface.
Sub Oscillator
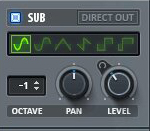
There is a third oscillator available in Serum called the sub oscillator, located on the left hand side of the OSC tab. This feature is mainly used for adding a subtle, low-end element to the sound.
Like the main two oscillators, this sub oscillator can be turned on or off using the blue square button next to the SUB title.
There is a Direct Out button in this section, which allows you to choose whether the sub is affected by the various modulators and extra effects within Serum.
Within the sub oscillator you can choose between several basic waveforms such as sine, saw, triangle etc.
At the bottom of the module are the basic Octave, Pan and Level controls.
This is a fairly rudimentary control module, but it’s more than enough for adding a very simple, underlying sub bass to your sound.
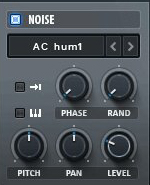
Noise Oscillator
The noise module is essentially a sampler built into Serum, usually used for subtle noise such as white noise, but can be used in many, highly creative ways.
As with the other oscillators, noise can be turned on or off using the blue square button, and there is a Direct Out button here also (controls whether the noise is affected by the various modulators and extra effects within Serum).
One of the most impressive things about the noise section is the amount of incredible, unique presets to choose from. There is so much hidden sonic potential in this noise module, from subtle crackling noises to harsh, resonating low-end sounds.
Noise Parameters
Like the main oscillators, the noise module has a Phase knob (determines the start point of the sound) and a Random knob (which allows Serum to play the sound from a random point within a specified section). These controls are likely to be much more noticeable in this section as the phase control actually determines the start point within the sound file, not the wavetable.
It also includes standard automatable Pitch, Pan and Level controls.
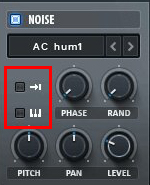
The two additional buttons (shown above) are actually very useful. The top arrow button will toggle between a looped sound and it’s one-shot equivalent. This is particularly useful for long, trailing noise effects where looping may sound strange, or very short sounds where continuous looping is necessary.
The mini keyboard icon simply allows the noise oscillator to be played through MIDI, meaning you can sequence patterns or melodies through your MIDI controller. In many cases this is not needed, as traditional “noise” sounds usually aren’t reliant on pitch changes.
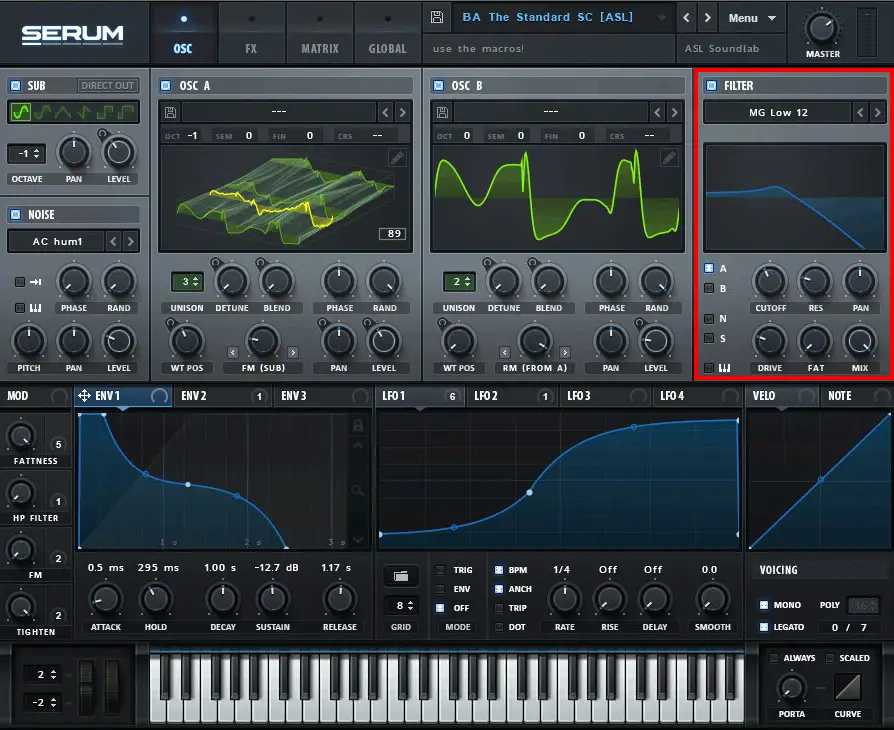
Filter
There is a simple filter module within Serum on the upper right hand side of the OSC tab. This is a fantastic option for adding basic EQ curves such as low/high passes or band passes or more complex filters to specific oscillators.
Serum let’s you choose from a range of filter presets, sorted into Normal, Multi, Flanges and Misc. There are some very unique, tantalizing filter types here, such as Comb, Formant and even Ring Mod filters.
Alternatively, you can use the parameters below to easily customize your own filter curves.
Cutoff: Determines the cutoff Hz value of the filter curve, essentially cutting out any frequencies above this value.
Res: The resonance knob determines how sharp your Q value (cutoff) is. You can see how this affects your filter curve in the mini visualizer above.
Pan: Determines the stereo spread (left or right) of the curve.
Drive and Fat: These knobs work very similarly and essentially boost the gain of the curve.
Mix: This determines to what percentage the curve is applied to the oscillators.
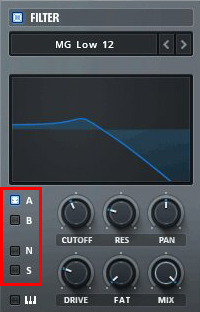
One of the most useful features of this filter module is the ability to select which oscillators the filter curve is affecting. By selecting / deselecting this buttons; A (oscillator A), B (oscillator B), N (noise) and S (sub), you can target the filter curve to specific parts of your final sound.
It’s worth noting here that Serum has a dedicated EQ section within the FX tab, which I will touch on later.
Envelope Modulation
Next we’ll take a look at the extensive, incredibly versatile modulation options within Serum.
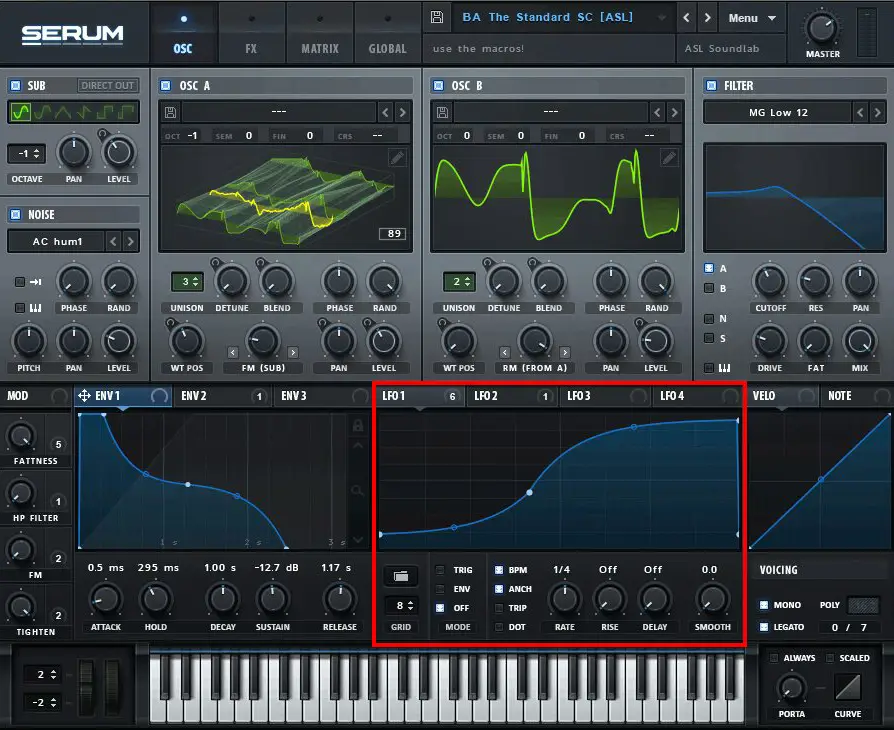
Within the modulation section, you have 3 envelopes, 4 LFO’s and velocity / note modulation options.
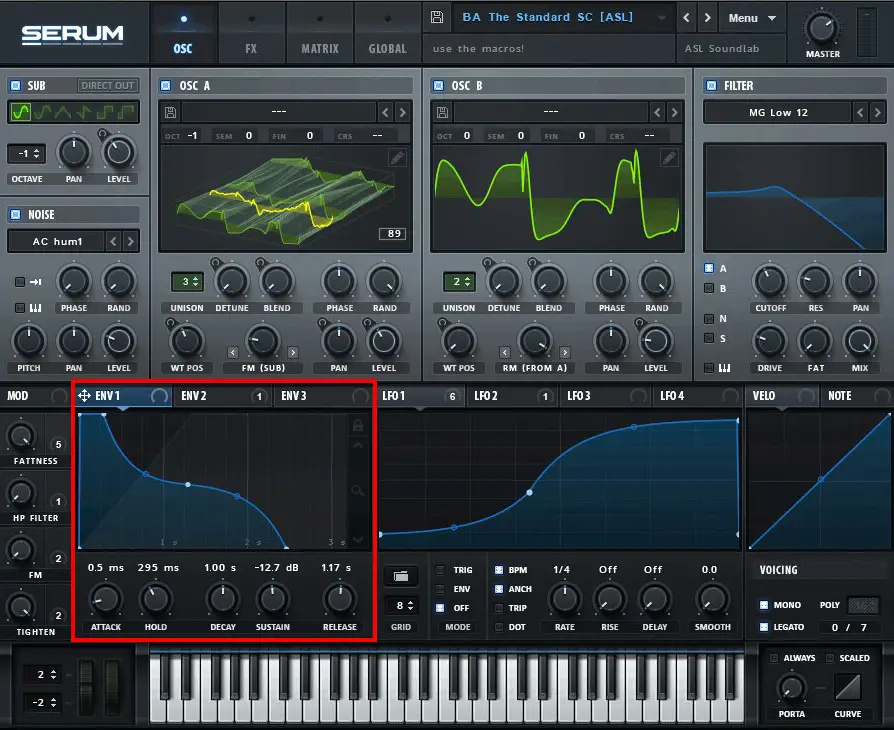
First let’s take a look at the envelope section. Serum allows you create your own envelopes by dragging the attack, hold, decay, sustain and release points. If you’re a complete beginner to audio envelopes, this is a great guide by teachmeaudio.com. Essentially, you are creating a automation path to determine how the level of a sound wave changes over time.
To do this, the easiest way is to drag the points on the envelope graph to create your desired envelope pattern.
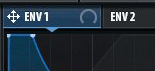
One of the things that makes Serum so powerful is the ability to drop the envelopes or LFO’s onto any knob within the Serum interface. To do this, simply click the arrow icon within the envelope or LFO top bar (the area highlighted above), and drag it onto a knob of your choosing.
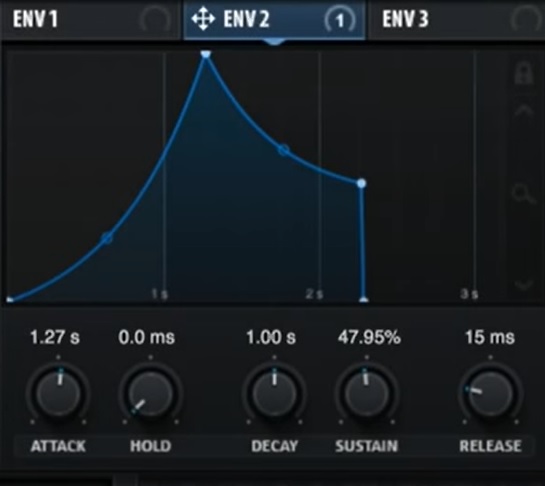
So take the above envelope for example. If this was applied to an oscillator’s “level” knob, you’d hear a smooth rise to the peak, no sustained peak, then a sharp volume drop. On the other hand, if this was applied to an oscillator’s “WT pos” knob, this rising envelope path would control the wavetable position of the oscillator. Given that envelopes can be applied to any knob, this gives way for an almost staggering amount of creative potential.
LFO Modulation
LFO modulation is arguably one of the most powerful elements of Serum. If you don’t know what LFO modulation is, or need a refresher course, here is a great guide to LFO’s. It’s essentially a slow modulation or “change over time”.
The best way to experiment with LFO patterns is to drag the LFO onto the “level” knob of an active oscillator (A or B), allowing you to hear the LFO affecting the volume in real-time. By default, the LFO module shows a simple triangular LFO pattern. This can be manipulated to your heart’s content.
To add a movable dot, double click within the LFO graph. Double click the dot again to remove it.
Dragging your cursor within the graph will select multiple dots at once.
Holding shift and dragging within the LFO graph will create a cool step sequence.
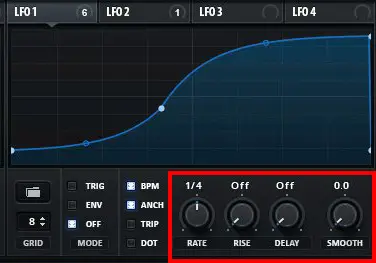
LFO parameters
Rate: This adjusts the rate or speed of the LFO. By default it is synced to your DAW tempo, but to manually set an LFO rate, deselect the BPM button to the left. The rate knob will now use Hz values to determine the rate of the LFO pattern.
Rise: This is the amount of time taken for the LFO graph shape to have an effect on the selected knob. This is very useful for letting the LFO have a slow, building influence over your sound.
Delay: This controls the amount of time before the rise begins.
Smooth: This “smooths out” the LFO output, essentially removing or decreasing any harsh LFO jumps.
Remember: you can drag LFO or envelope patterns onto any knob within Serum, so experiment with adding various weird and wonderful LFO/envelope shapes onto different knobs and see what comes out the other end. Don’t think too much about this process, any sound designer will admit the best results usually come from free experimentation and hoping for the best!
Osc Tab: Miscellaneous Controls
There are a few additional controls and features worth mentioning before we take a look at the other tabs within Serum.
Pitch Bend
Serum has a pitch bend wheel to the right of the keyboard, similar in style to a classic MIDI controller. Using the two vertical values, you can set the upper and lower limits of the pitch bend. Using the left wheel, you can then bend the pitch of your sound, which comes particularly useful when automated within your DAW.
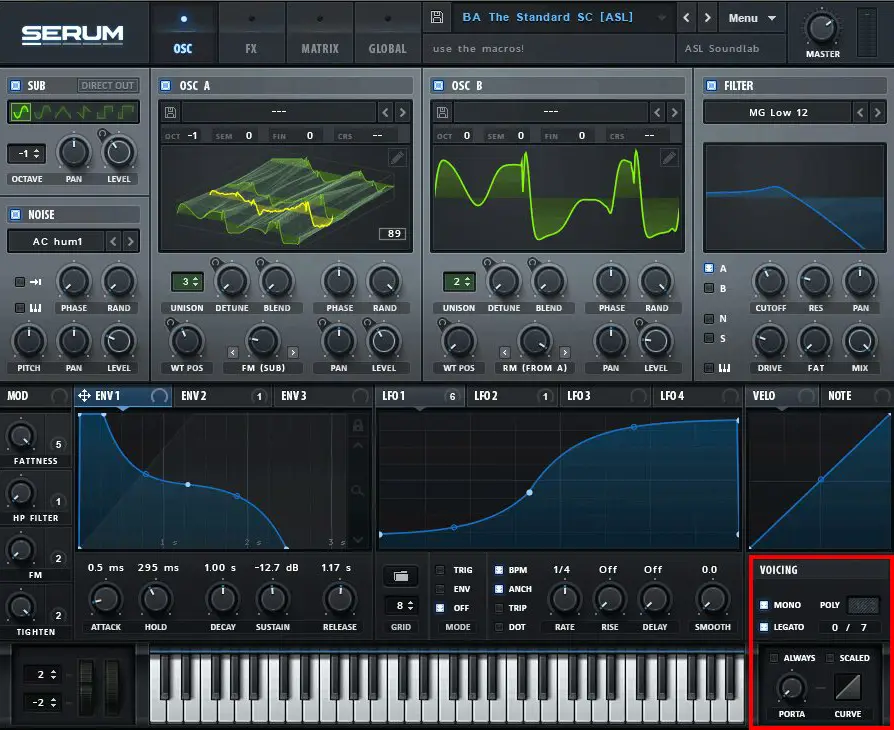
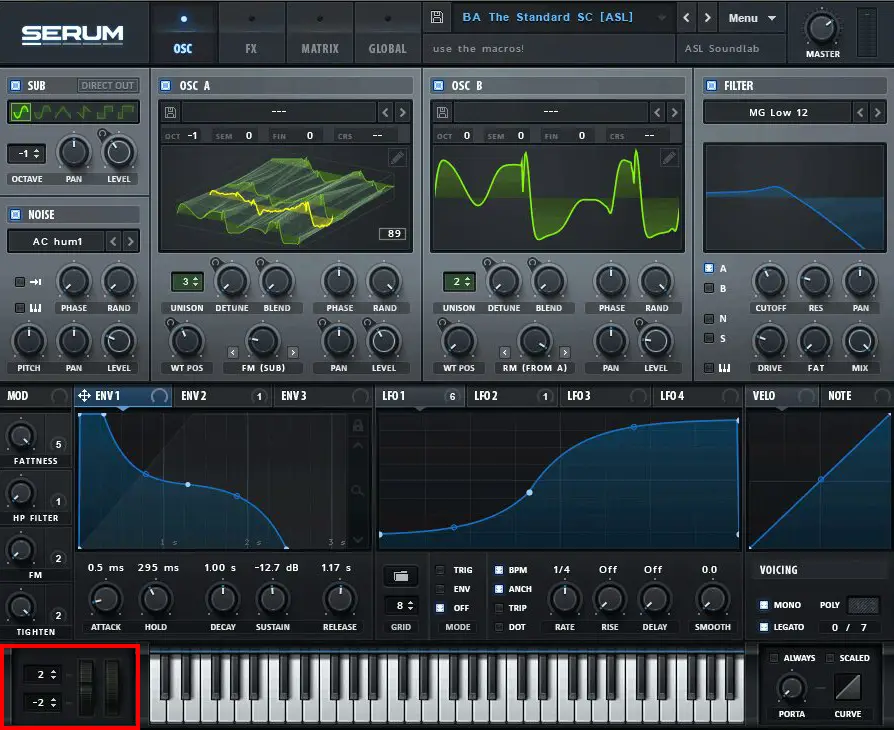
Voicing / Portamento
Serum can be set to mono, which could be useful for solo melodies, or adding portamento. There is also the option here to add poly voices, to “thicken” up your final sound. The portamento knob can be found directly under the voicing section, and determines the transition time between overlapping slide notes.
So there you have it: the Oscillator tab. This is where you’ll spend the vast majority of your time in Serum, and is essentially the tab you’ll use to create your own sounds. Now let’s move on to the next section, the dedicated effects tab.
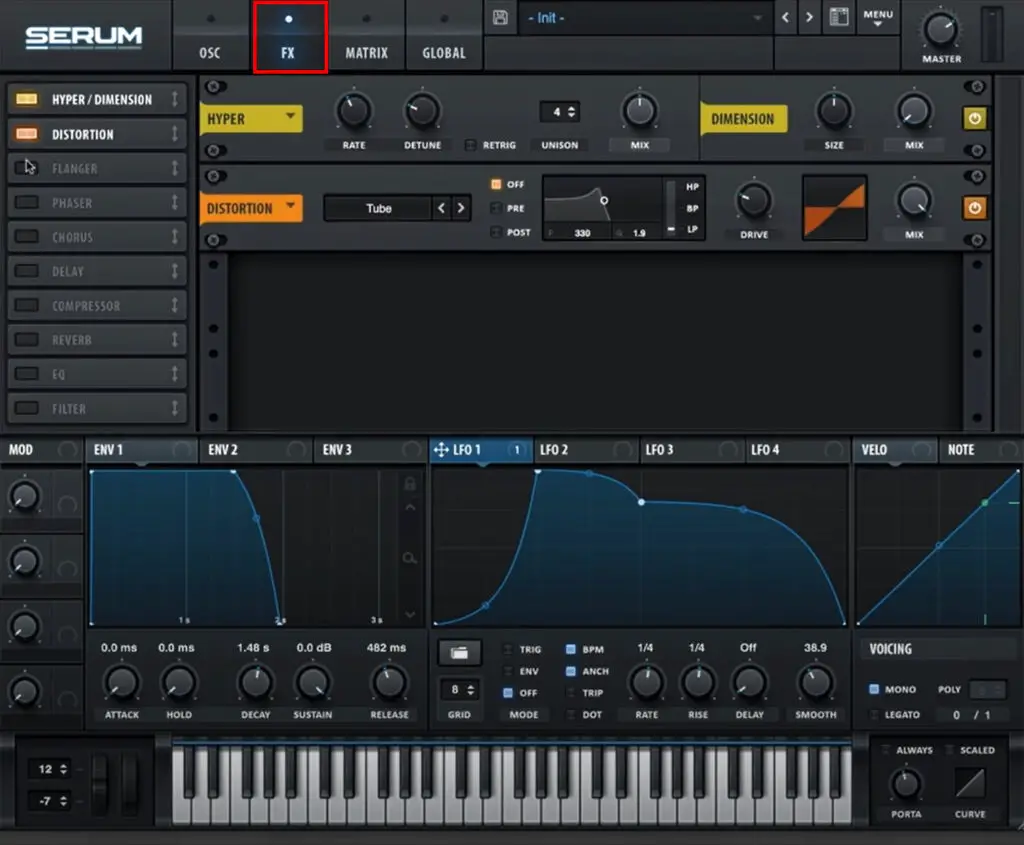
Effects Tab
Serum actually implements a fully-featured effects matrix with a fantastic selection of effects such as reverb, EQ, delay, compression and chorus. In many cases, this removes the need to add extra effects within your DAW, as this function can be fine-tuned within the Serum interface.
Granted, there will be instances where you need a more expansive effect, such as a reverb plugin like Fab Filter’s “Pro-R“. But for fairly basic effects, this module works like a charm.
Now, I’m not going to go through every effect available in this tab, that would be overkill. Each effect is actually very intuitive and easy to understand, so I’ll let you discover the individual effects for yourself.
To turn on/off an effect, there’s a rectangular toggle button next to each effect. You can also change the order of the effects by simply dragging them, bearing in mind Serum routes the effects top to bottom.
This tab is really useful for adding additional sonic flourishes and finetuning the end result, but for in-depth effect synthesis, you’ll still need VST plugins.
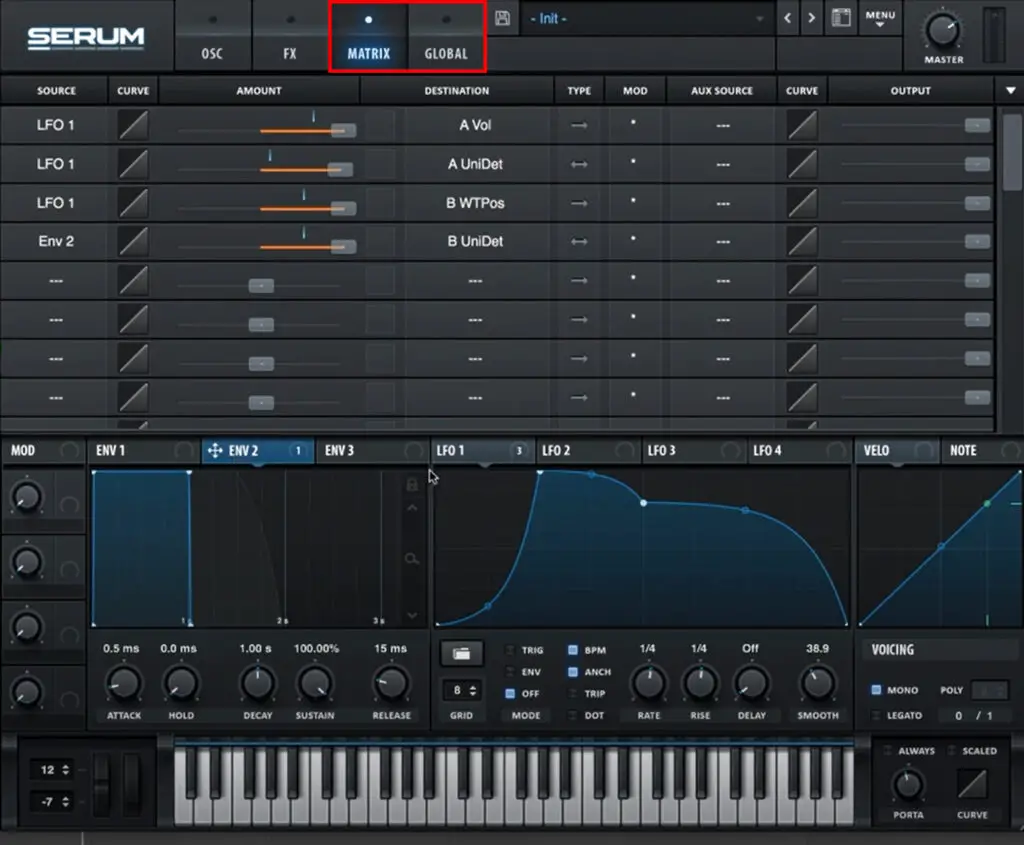
Matrix Tab + Global Tab
In complete honesty, if you’re a complete beginner to Serum, I wouldn’t worry too much about these last two tabs for now. There become much more important when you have a deep er understand of the Serum software and how it all links together. But in simple terms, the Matrix tab gives a list view of the various routings and their amounts for each modulation connection you’ve created within Serum.
Many software synthesizers have a modulation matrix, and they are a very handy way of viewing all your modulation connections at once so all your linked parameters don’t become too overwhelming.
Say for example, you were creating a complex sound with all your LFO’s and envelopes connected to various knobs within Serum, the Matrix tab gives an organised, stripped back view of all these connections.
Using the Amount slider for a specific modulation connection, you can easily control the level of the modulation itself.
Global Tab
I honestly wouldn’t touch anything in this tab if you’re a beginner. There’s no features here that will dramatically improve your experience with Serum, as it’s pretty great right out the box. Maybe down the line you can start to tinker with these settings, but for now i’d focus on the sound design aspects of Serum.
And there you have it!
An in-depth look at the main features of Serum, from a beginners perspective.
My main advice now would be to not get bogged down in the specifics and tiny details of sound design in Serum. Create some interesting wavetables, add the sub and/or the noise oscillator for a deeper, more layered sound. Then experiment with some original envelopes and LFO patterns, which is usually where things get really interesting.
I wouldn’t recommend spending hours on one sound to start with. In my opinion, it’s more beneficial to create as many sounds as you can, to gain a much broader understanding of this incredible piece of software. And remember, sometimes the best results come from breaking the rules, so don’t be afraid to try out some weird, unorthodox modulations or effects.
Good luck!

How To Use Serum Review: Similar Articles
The 5 Best VST Plugins for Beginners
How to use FL Studio | Step by Step Tutorial for Beginners