How to use FL Studio | Step by Step Tutorial for Beginners (2022)
What is FL Studio?
FL Studio (formerly Fruity Loops) is an incredibly powerful, versatile DAW (Digital Audio Workstation) that remains one of the most popular, innovative music production programs on the market.
If you’re just starting out with music production, or you’re an advanced producer looking to experiment with a new DAW, FL Studio can seem quite intimidating. The interface has a very dark, almost ominous appearance, with numerous knobs, sliders and overlapping windows, which leads many beginners to the question: “where do I even start?”
FL Studio Tutorial
I have been using FL Studio for over 15 years, and it has served as my primary DAW of choice for the entire duration of my music production journey, however I remember the first time I opened the program and how complicated and daunting everything looked.
In this guide I will break down how to use FL Studio from a beginners perspective, and simplify the process of learning and understanding the basics of this incredible program.
So let’s get started…
The video version…
The video below is the video version of this article. You can either watch this video, or keep scrolling to read more!
Article sections:
1. The Top Bar
2. Overview of the 5 Main Sections of FL Studio
3. The Browser
6. The Playlist
7. The Mixer
8. To Conclude
1. The Top Bar
Upon opening a blank project file in FL Studio, the interface may seem a little confusing, but this should all become a lot clearer over the course of this guide.

The Menu Bar
Up in the top left, you’ll notice a menu bar with File, Edit, Options etc.
In the File section, you’ll find your options to open new files, save your projects, and export your files to MP3 and WAV form.
In the Options sections, you can play around with your MIDI settings, Audio settings and General settings. This is where you would connect and configure your sound card, audio interfaces, MIDI keyboards/controllers and other external devices. We can worry about this later however, for now we are just looking at understanding the programs interface.

Master and Transport Controls
On the left, you’ll see the master volume (above) and master pitch (below). For beginners to music production, it’s best to leave these as they are.
Moving along the top bar, you’ll see the Pattern/Song switch button, allowing you to switch between editing a loop or pattern, and editing the track as a whole (I’ll be explaining this in more detail below).
You’ll notice you then have your play, pause and record buttons. Next to those is the tempo selector, which you can change by simply left click and dragging, or simply right click and choose type in value to manually input your chosen tempo.
The horizontal slider below shows the point at which your pattern is currently being played.
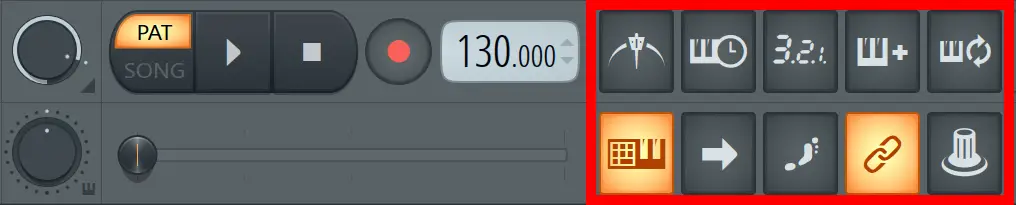
Recording and Editing Buttons
These buttons are additional features and options that are very useful when recording and editing sounds, such as Metronome On/Off and Countdown before recording, but to find out what each button does simply hover over a button and a short guided message will pop up in the space below the menu bar describing the function.
These buttons will begin to make sense the more you play around with the FL Studio interface.
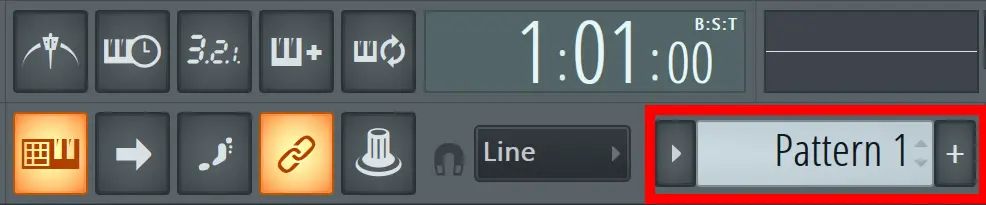
Pattern Selector
The basic concept of FL Studio is to edit and create individual patterns and then arrange them into full tracks. This selector is an important part of the program that allows you to choose the pattern you’d like to individually select and edit.
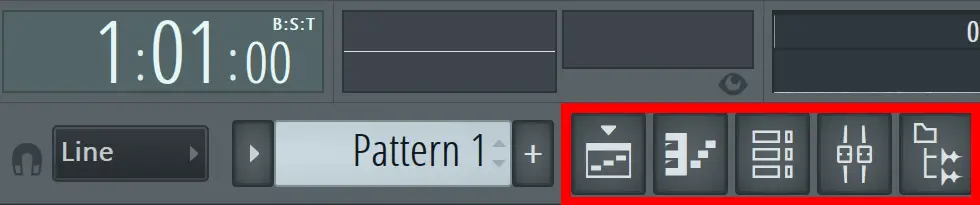
Window Buttons
The last feature of the menu bar you need to know about at this point is these first five buttons that control which windows we see inside the FL Studio interface.
The windows option we have are: Playlist, Channel Rack, Piano Roll, Browser and Mixer.
These are, simply put, the 5 main sections you will use to create your tracks, right up to the final mix. These 5 sections are your bread and butter, and I will break them down and simplify each one in the next section.
2. Overview of the 5 Main Sections of FL Studio
Here I will highlight the 5 sections of FL Studio you will need to know about to fully understand the program. I won’t be going into much detail here and will just identify each section, but I will go into more detail on each section later in the guide.
As I said, each of these sections can be shown/hidden by clicking the corresponding button in the top bar.
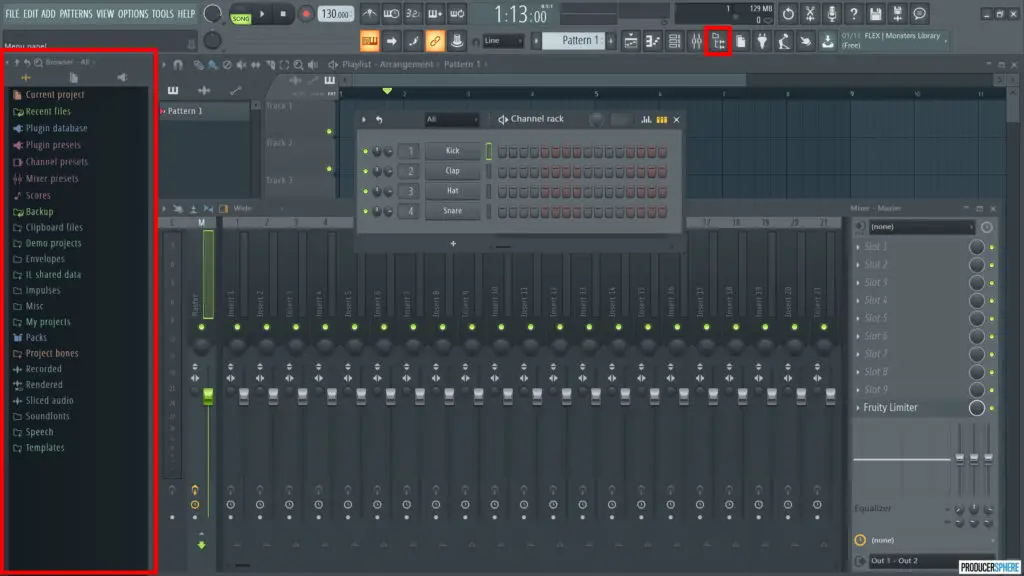
Browser
Down the left side of the interface, you have your browser. This is the section where your sounds, samples and instruments are stored in a folder view for you to browse and choose the elements you’d like to add to your projects.
This folder layout mirrors the actual files in your documents, so when saving sounds on your computer, save them in the folder you want to see them categorised under in the Browser view.
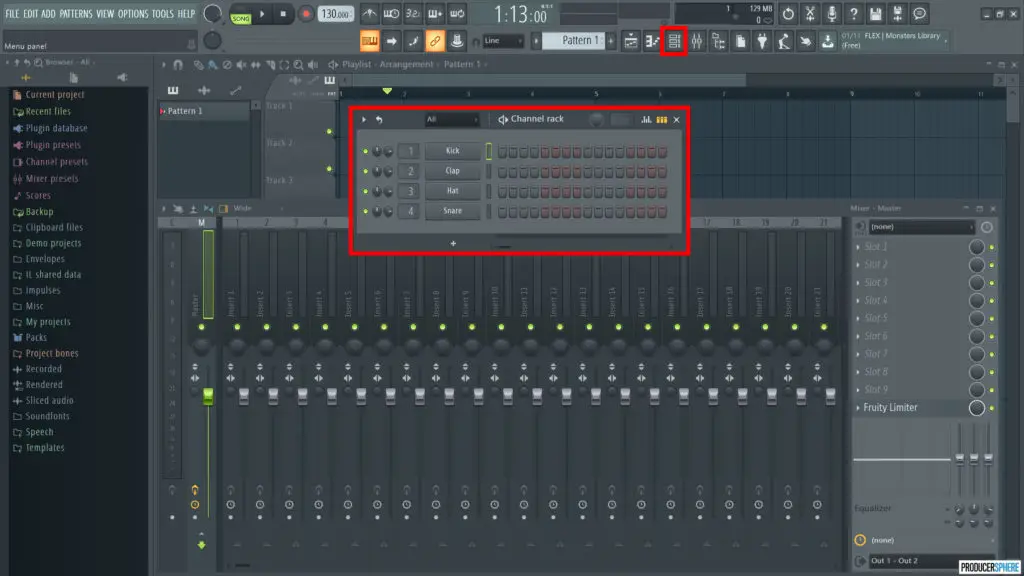
Channel Rack
This is the section of FL Studio where your sounds, samples and instruments you have specifically chosen for your track are stored and utilised. This is where you will create patterns or loops, and most of the editing process will happen here.
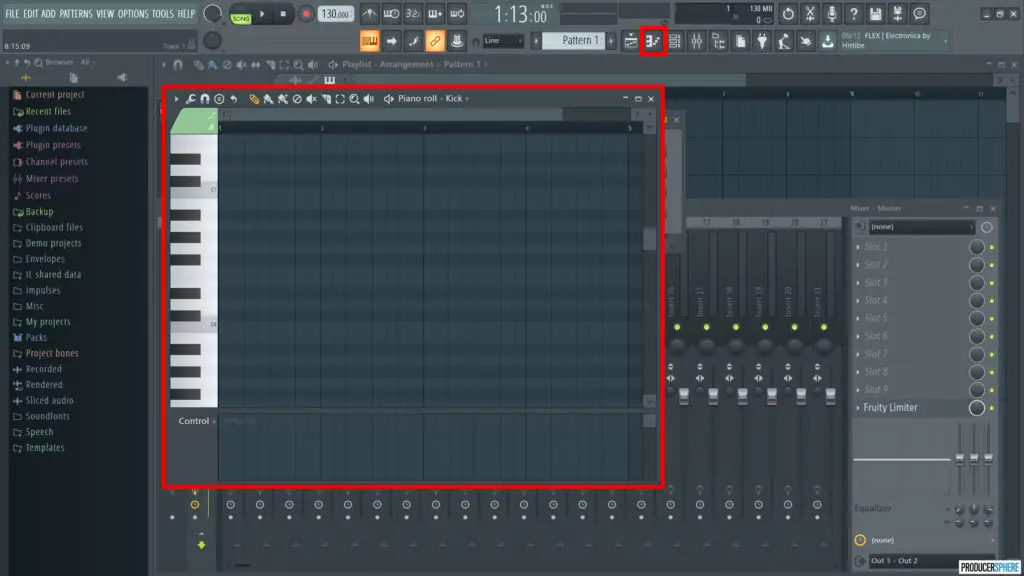
Piano Roll
Within the piano roll you can compose and edit MIDI patterns and melodies. The piano roll feature in FL Studio is incredibly intuitive, and so, so easy to learn if you are a beginner. Within this view you can also edit the velocity, pan and length of each individual note in your pattern.
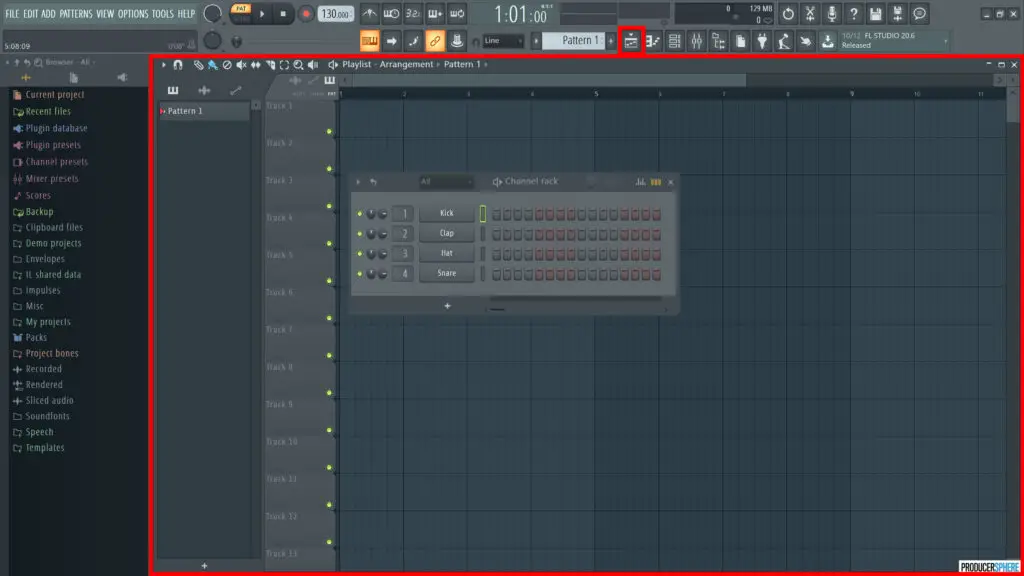
Playlist
This section is where you take your edited patterns, and arrange, slice and sequence them to create a song. This is where you will flesh out and structure your track.
Mixer
This is where all your audio and MIDI information is sent to be mixed, and each audio file can be assigned to a mixer track. Within the mixer interface, you can tweak the volume, pan and other parameters, as well as add effects, filters and VST plugins to your sounds such as reverb, delay and compression.
Now you have a very basic grasp of what each section is and how to find them, let’s dive into each section in more depth, how they are used and how they interact with each other.
3. The Browser
Within the browser section, take a moment to browse the default folders full of drum and instrumental sounds and samples. Under “Packs” you’ll find many native sounds that come with the FL Studio software.
For beginners who haven’t collected any samples just yet, this is a great resource to find sounds to play around with. You can also use the “Search” feature to look for sounds in the browser by clicking the top magnifying glass.
How do I input my own sounds into the browser?
If you’ve already begun collecting samples or have purchased a couple of sample packs, you’re likely wondering how to browse and access your own folders within the browser interface, and it’s incredibly simple.
Go to Options in the top menu, then to File Settings, then under Browse Extra Search Function, click a folder down the left hand side to add a folder to the browser.
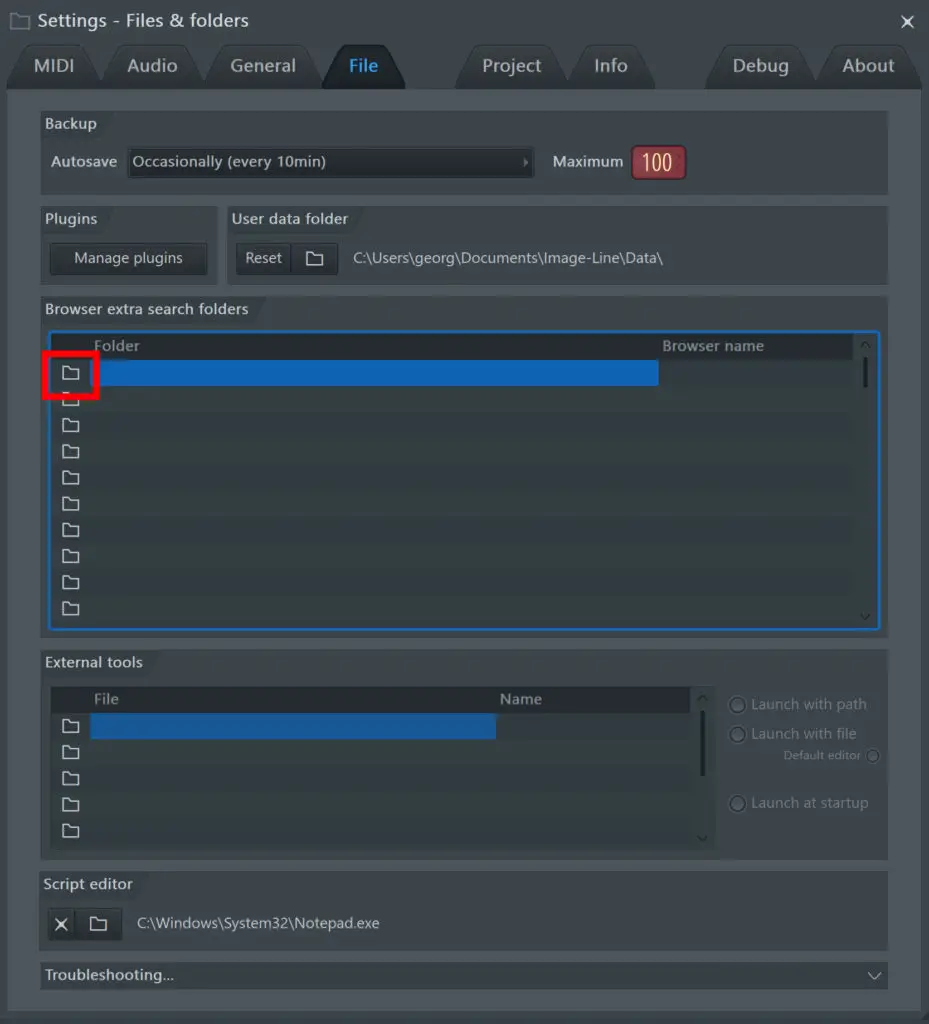
Once you’ve chosen a folder, click OK, and if you want, you can rename the folder with FL Studio by clicking the name in the Browser Name column on the right. You should now see your chosen folder within the browser panel.
Note: Sometimes the folder won’t automatically rename itself within the browser. To fix this simply click re-read (the arrow next to the magnifying glass at the top of the browser, and your folder name should update.
How do I get sounds from the browser into my track?
To import your sounds into the project, simply left click on the desired sound file, and drag it into the channel rack. The best thing to do is drag and drop the files just below the bottom sound in the channel rack, as dropping it onto another file within the rack will replace it.
You’ll now see the sound has been added to your project, and it now exists within the project and can be chopped, sliced, edited and mixed to your heart’s desire.
That’s all that really needs to be said about the browser when you’re first finding your feet with FL Studio. Take a moment to import some sounds into your project and make sure you understand how this works before moving on.
4. The Channel Rack
The channel rack is one of the main elements you’ll use in FL Studio when creating a track. The reason it’s called a channel rack is because it’s where all your channels are stored, including samples, VST instruments and automation clips.
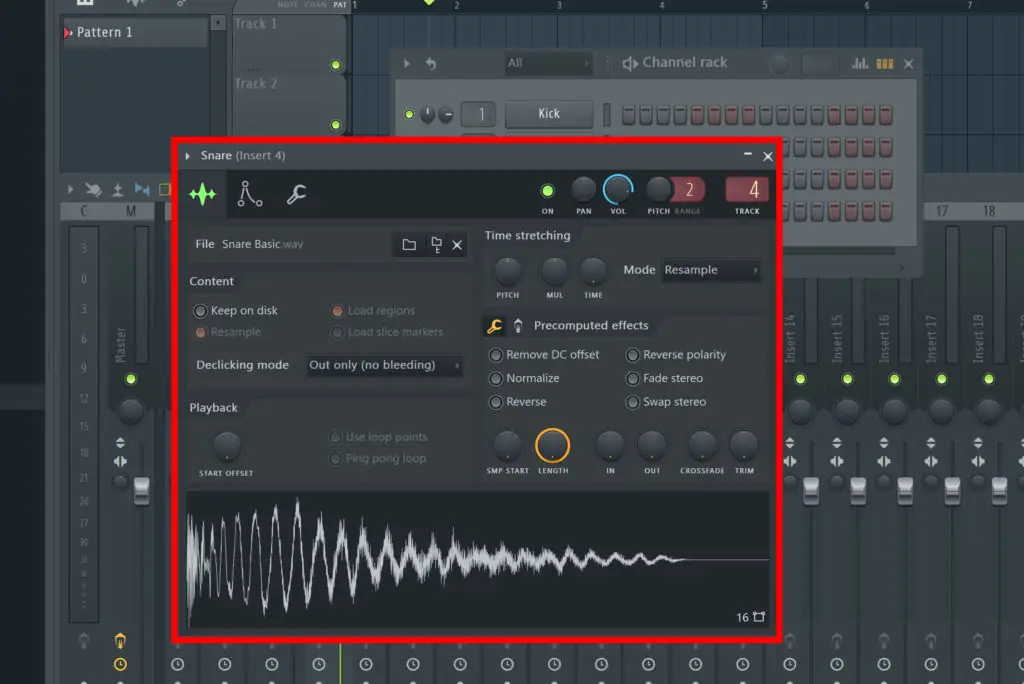
By clicking on any one of the channel names within the channel rack, it brings up the wrapper, where you can edit and fine-tune each sample, including pitch, pan and reversing the sound, although I won’t touch on this too much for now.
I’ve covered how to add sounds to the channel rack above, but to delete any channel from this section, simply right click on it and press delete.
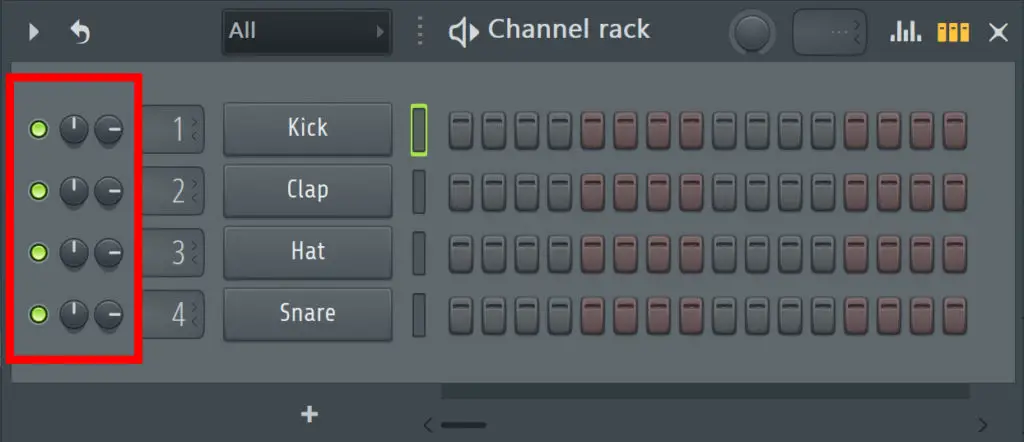
Mute, pan and volume knobs
At the left of each channels row, you have a lit-up green button, pressing this will mute the channel.
Moving along, we have two knobs. The first is for controlling the pan of the channel, and the second is for controlling the volume. These controls are also available within the wrapper, but are linked and literally control the exact same thing.
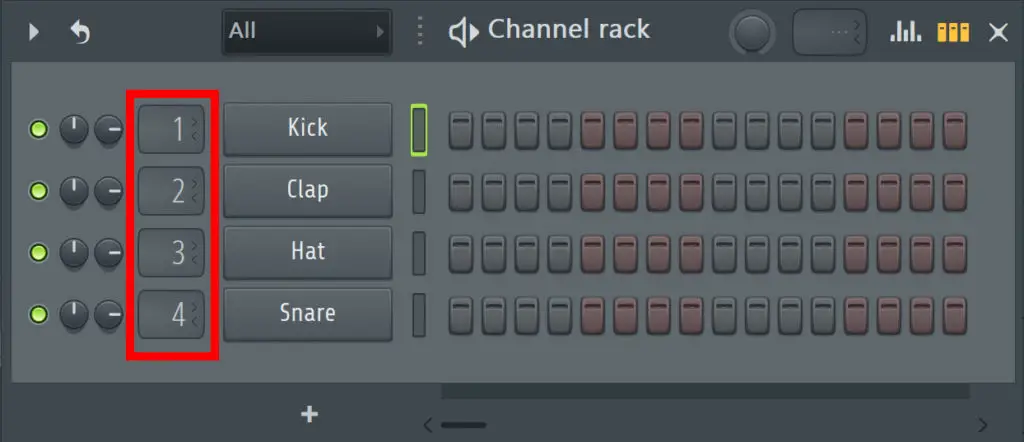
Mixer channel
The next box along determines which mixer channel the sound or instrument will be sent to. I’ll be covering the mixer later, but for now this is how you would add individual effects to your chosen channel.
To choose the mixer channel, left click inside the box and drag up or down.

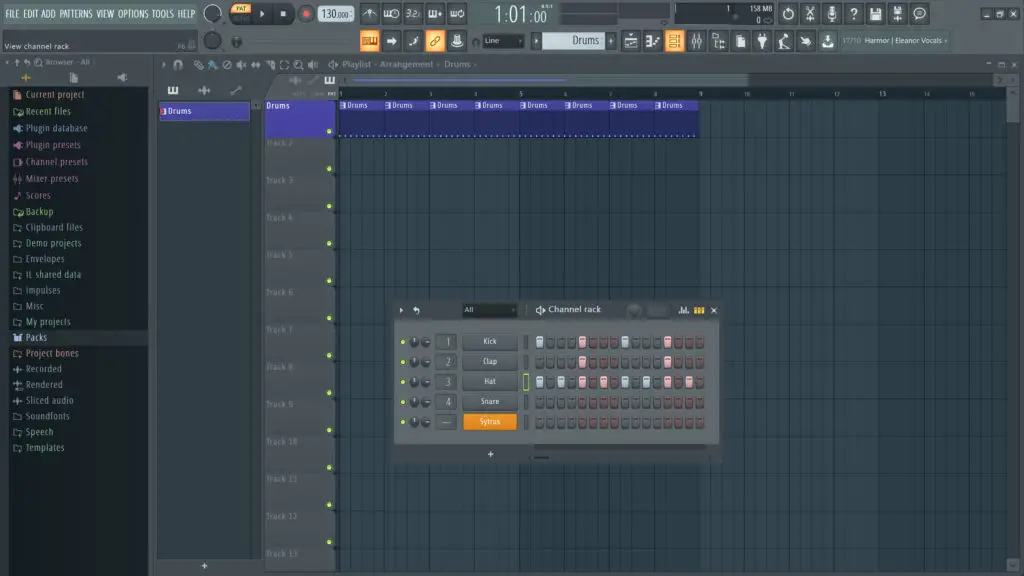
Step sequencer
This is where the fun begins. FL Studio’s iconic step sequencer is one of the easiest ways to create a drum pattern in any DAW. Hands down. To add a step or “hit”, left click on any of the step buttons and they will light up, and to delete steps, just right click your highlighted step. You can also drag left or right click to select multiple steps within a channel at once.
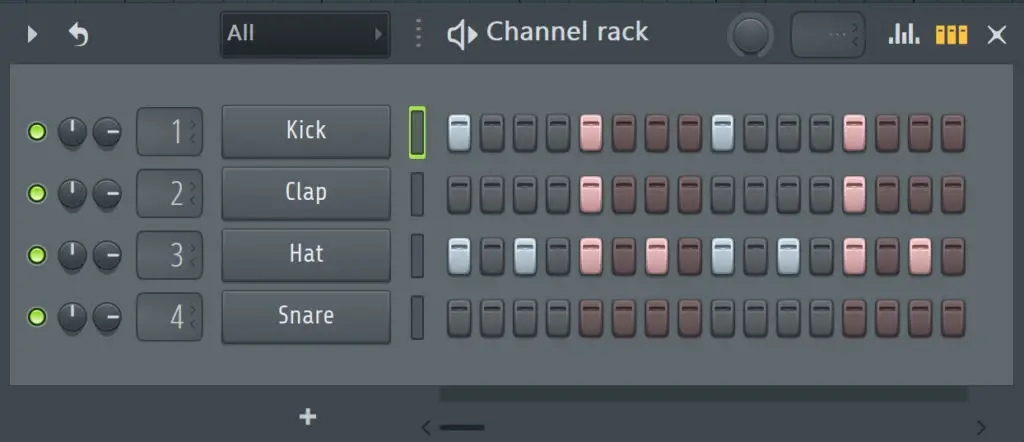
Go ahead a create this pattern on your step sequencer, then experiment with adding extra snare hits or changing the kick pattern. Even to someone with no knowledge of music production or beat making, this incredibly intuitive sequencer is a lot of fun.
Your options really open up when you start to add your own sounds to the channel rack (as highlighted in the browser section), and begin to sequence your own sounds and samples. This drives a lot of creative freedom using a simple process with an incredibly small learning curve.

Channel parameter editor
If you want to change the key, pan or volume of a single step or note within your sequence without impacting the entire channel, click the graph icon in the top right of the channel rack which will bring up a parameter editor.
Along the bottom of this small window you’ll see the options Note, Vel, Rel, Fine etc. These options are for editing levels for individual notes or steps.
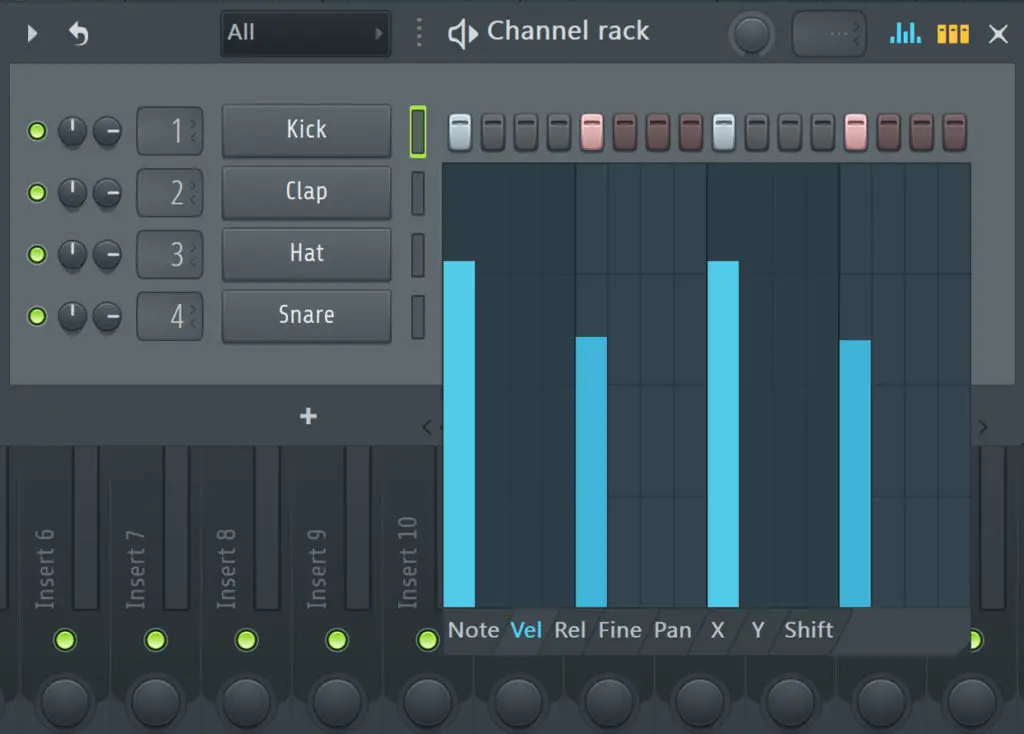
For example, by clicking on Vel you can customise the levels of velocity or “hardness” of each step in your sequence by dragging the corresponding level up or down.

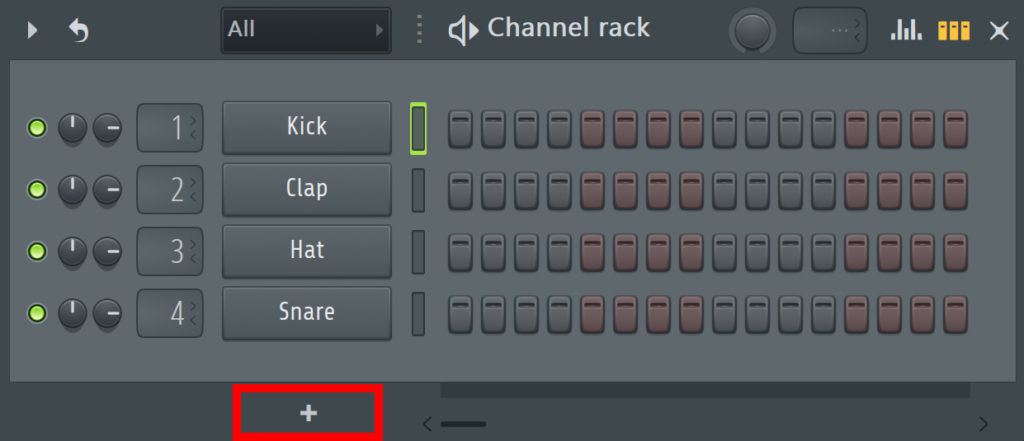
Add VST Instrument
The final feature of the channel rack I want to highlight is the plus button at the bottom which, when clicked, will bring up a list of default and user added VST instruments. Simply select one and it will be added to your channel rack. If you’re unsure about how to install and add your own plugins to FL Studio, here is our quick, easy guide.
Or, want to find out more about the best VST Instruments for beginners? Click here.
Now, before we move on to arranging and layering these patterns to form a song, I want to touch on the piano roll feature.
5. The Piano Roll
The piano roll is where you compose, slice and edit the MIDI notes of a selected channel with much more precision and detail. It is incredibly helpful for example, to tweak a MIDI keyboard performance or lengthen certain notes within a sequence.
To open to piano roll for a chosen channel, right click on the channel name and select Piano Roll.
Using the piano roll for percussion
The piano roll will mainly be used for editing melodies of VST instruments or tonal hits, but occasionally you will use this feature for percussion.
It is particularly helpful when editing quick, successive percussive hits such as hi-hat rolls, which wouldn’t be possible within the limits of the basic step sequencer, or off-timing where steps don’t land on the exact beat.
Similar to the step sequencer, left clicking will create new notes, and right clicking will delete them.
Using the piano roll for instruments
Like I said, most of your work within the piano roll will be editing melodies and chord progressions. To see how this is done, add a VST Instrument to the channel rack, right click on the name, and select piano roll.
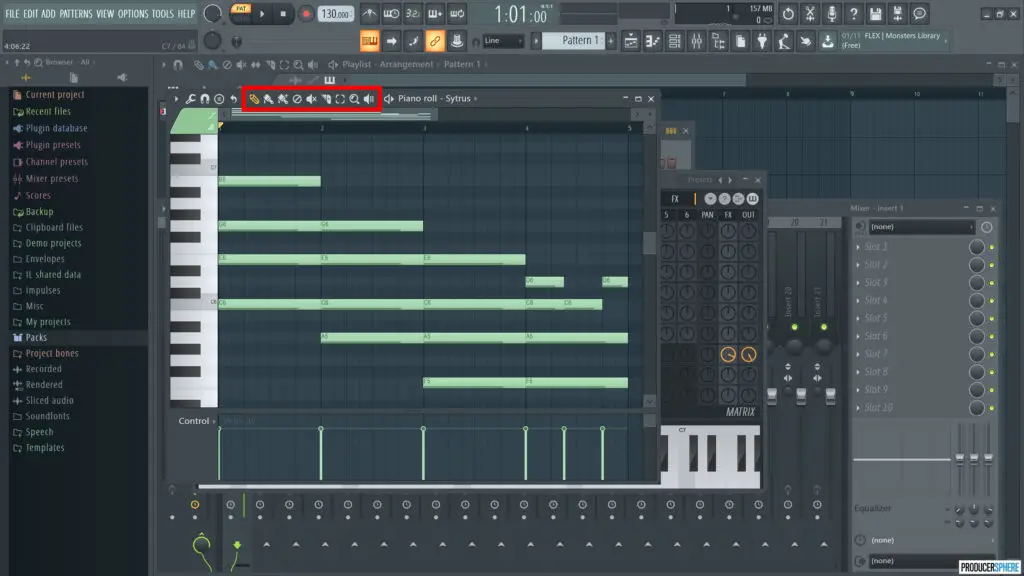
Editing icons
Along the top bar of the piano roll window, you’ll notice several icons. These are your editing tools, and can be used to precisely edit, slice, lengthen and select your notes.
I won’t go into too much detail on each icon here, as they are fairly self explanatory, but hovering over each one will tell you about the function of the button. Have a play around with creating some basic chords or melodies within the piano roll, and experiment with these tools to manipulate your sequences.
Pencil tool: This let’s you individually draw notes in the piano roll.
Paintbrush tool: Using this tool, you can left click and drag notes along the piano roll.
Delete tool: Using this tool, you can left click and drag to delete notes, although honestly it’s way easier to just right click and drag within the pencil or paintbrush function to delete notes.
Mute tool: Using this tool allows you to mute selected notes.
Slip tool: This tool allows you to lengthen notes by dragging them from the edges.
Slice tool: This tool can be used to chop or “slice” notes.
Select tool: Using this tool, you can left click and drag to select multiple notes.
Zoom tool: This tool can be used to zoom into a section of the piano roll.
Playback tool: Using this tool, you can select exactly where you want to play the sequence from.
Now that you’ve arranged and created an original pattern, it’s time to arrange it into a pattern, which brings us to the playlist section.
6. The Playlist Section
To begin arranging your patterns, open the playlist view by selecting the playlist button in the top menu bar. Here you will arrange your patterns and layer them to create your full track.

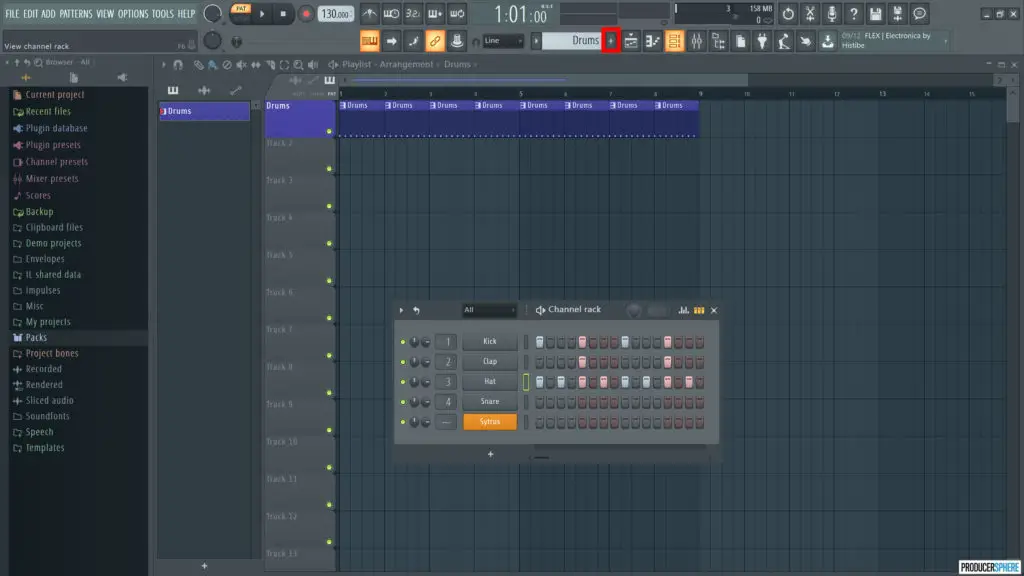
Pattern/Song Switch Button
I glossed over this button at the beginning of this tutorial, but using this button you can switch between what is being played back to you; the individual looped pattern, or the full song within the playlist section.
Adding a pattern to your track
To add your pattern to your track, simply left click within the playlist section, and your pattern will appear.
Unlike almost all other DAWs, you can place any pattern anywhere within the playlist, and each pattern is not limited to it’s own track row. The only downside of this is, if you’re not careful, playlists can get very unorganised and confusing, so it’s always best to rename the pattern and tracks to reflect what pattern its playing.
To do this, right click on the track name, and select rename, color and icon… It’s always easier to produce full, complex tracks when sounds are kept within their corresponding tracks.
Editing icons
The editing icons at the top of of the playlist window are very similar to the ones in the piano roll. Here’s a brief overview of their functions:
Pencil tool: This let’s you individually draw in your selected pattern.
Paintbrush tool: Using this tool, you can left click and drag your selected pattern along the track.
Delete tool: Using this tool, you can left click and drag to delete patterns, although honestly it’s way easier to just right click and drag within the pencil or paintbrush function to delete patterns.
Mute tool: Using this tool allows you to mute selected patterns.
Slip tool: This tool allows you to lengthen a pattern by dragging it from the edges.
Slice tool: This tool can be used to chop or “slice” the patterns.
Select tool: Using this tool, you can left click and drag to select multiple patterns on multiple tracks.
Zoom tool: This tool can be used to zoom into a section of the playlist.
Playback tool: Using this tool, you can select exactly where you want to play the track from.
Adding multiple, different patterns to the playlist view
Adding a separate, completely different pattern to your track is an essential step to start building and layering your track. To do this, navigate to the pattern selector in the top menu and select the plus button to create a new pattern. This creates a blank channel rack within which you can create a new pattern, and add it to the playlist in the same way as above.
This is also the function you’d use to switch between patterns you’d like to edit. The arrow to the left of the selected pattern name will show a list of all your created patterns, allowing you to choose the pattern displayed in the channel rack.
To summarise what we’ve learnt so far…
At this point, we’ve covered a lot of information, and now would be a good time to try out everything we’ve got through so far. So experiment with these steps, referring back to the information above:
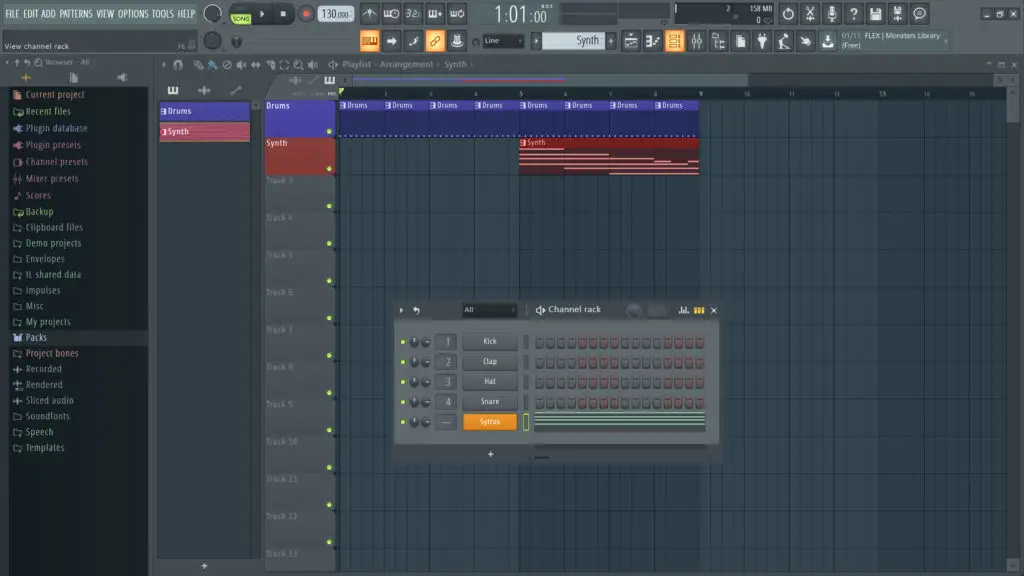
- Open a new project
- Drag some chosen sounds from the browser into the channel rack.
- Create a drum pattern
- Add the drum pattern to your playlist for 4, 8, or 16 bars
- Create a new pattern, add a VST instrument and create a basic chord or melody loop.
- Add this instrument pattern to your playlist over the drums, maybe starting at the 4th or 8th bar.
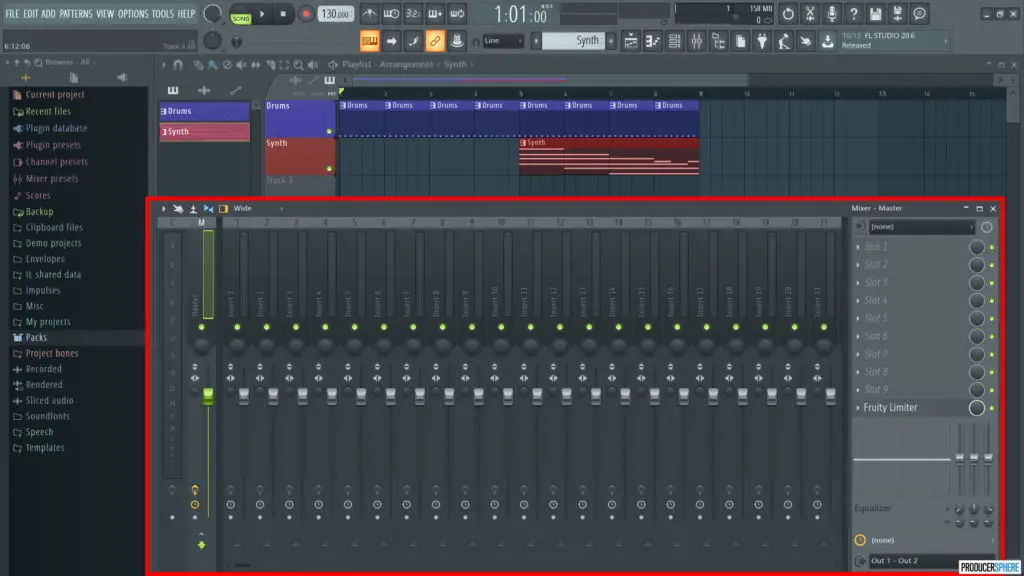
You’re screen should look something like this:
The final section of FL Studio is where your sounds will be sent to be mixed, and where you can add effects to your sounds, so let’s move on to talk about the mixer.
7. The Mixer
The mixer is the final section of FL Studio you’ll be using, and for complete beginners to music production, it’s best to focus on the rest of the process for now, and only move onto the mixer when you’ve full grasped these stages.
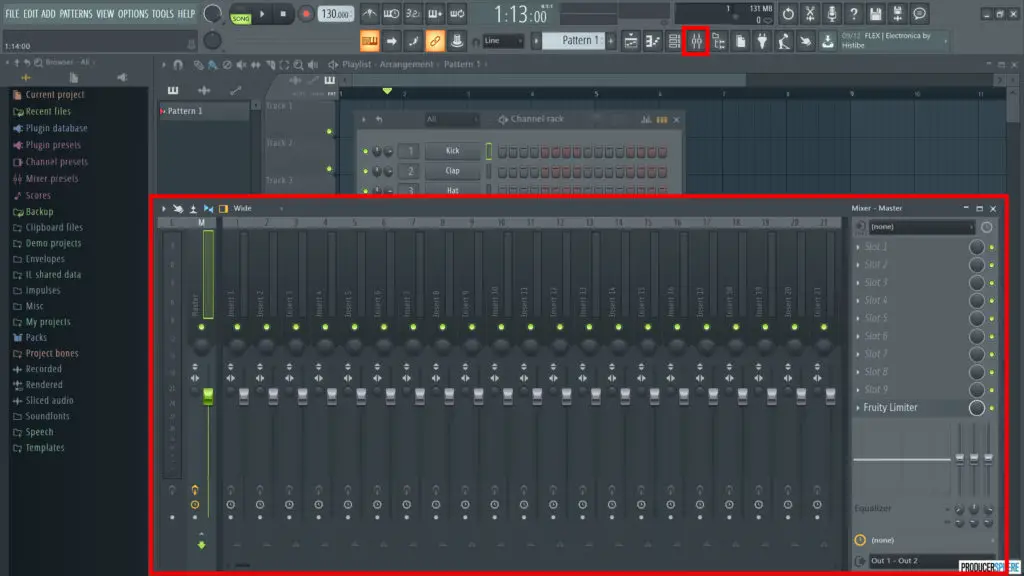
To open the mixer, click the mixer button in the top menu bar, or press F9.
This section is where you’ll mix your tracks, focusing more on sound design, effect processing and fine-tuning your tracks. You can add effects such as reverb, delay, compression and many, many other audio effects to your mixer channels, and using this mixer effectively can completely transform your songs into professional-sounding masterpieces.
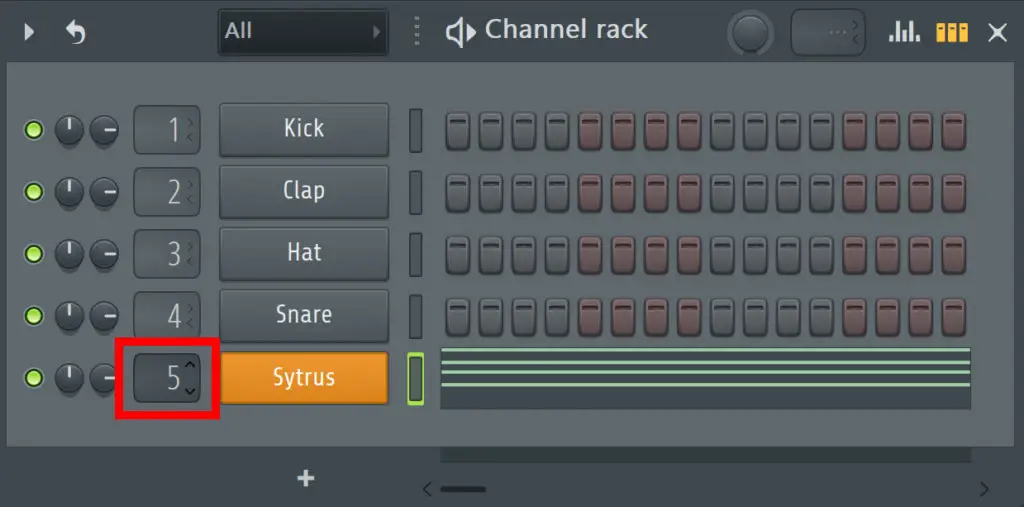
Sending sounds or instruments to mixer channels
To send a specific sound to a specific mixer channel, left click and drag the numerical value to the left of the sounds name within the channel rack to your chosen value. This will send your sound or instrument to the corresponding mixer channel, in which you can now add effects or change certain parameters.
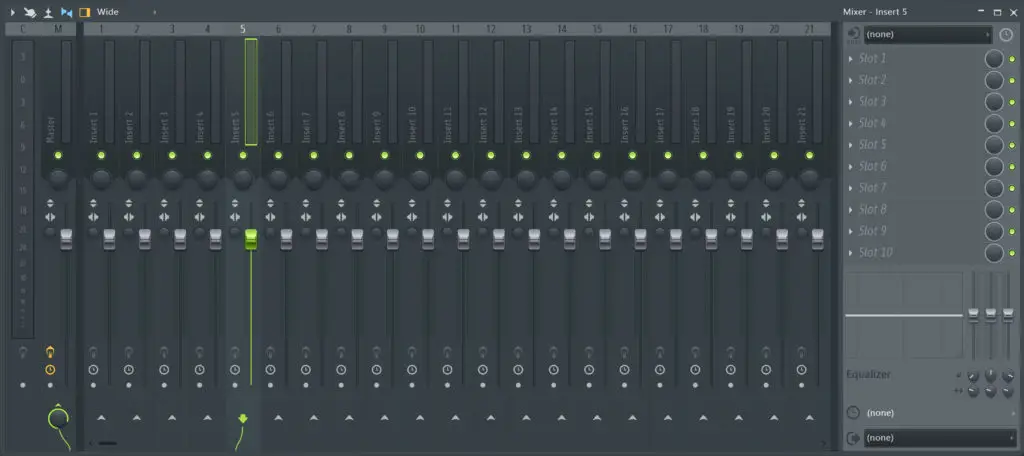
Mixer channel levels
You’ll notice the far left mixer channel is your master channel, which is where you can edit the overall pan, volume or other functions of the entire song.
Focusing on one individual mixer channel along the mixer window, you’ll see multiple buttons and a large fader control for each mixer channel. For any given mixer channel, let’s focus on the basic controls and how to fine-tune a mixer channel.
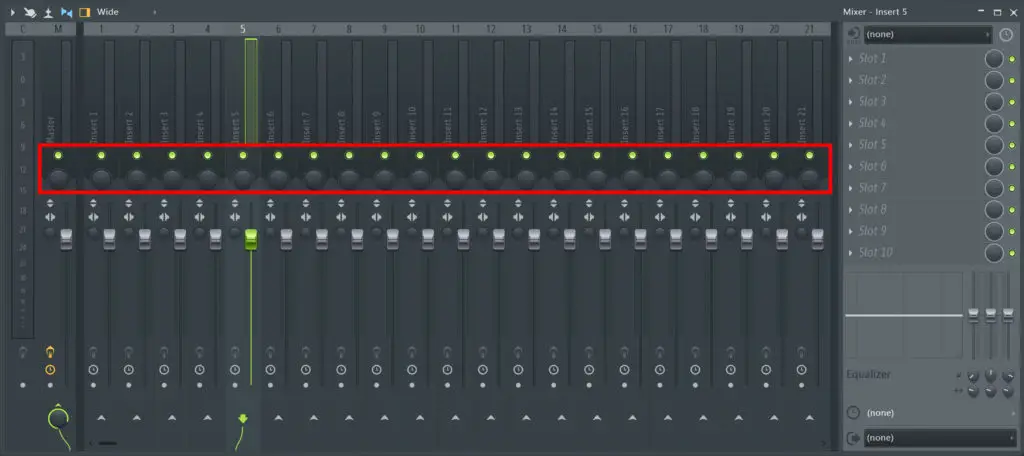
Pan control and mute
Using this control, you can change the pan of the mixer channel from left to right. Just to above this, you can use the lit up green button to mute the mixer channel.
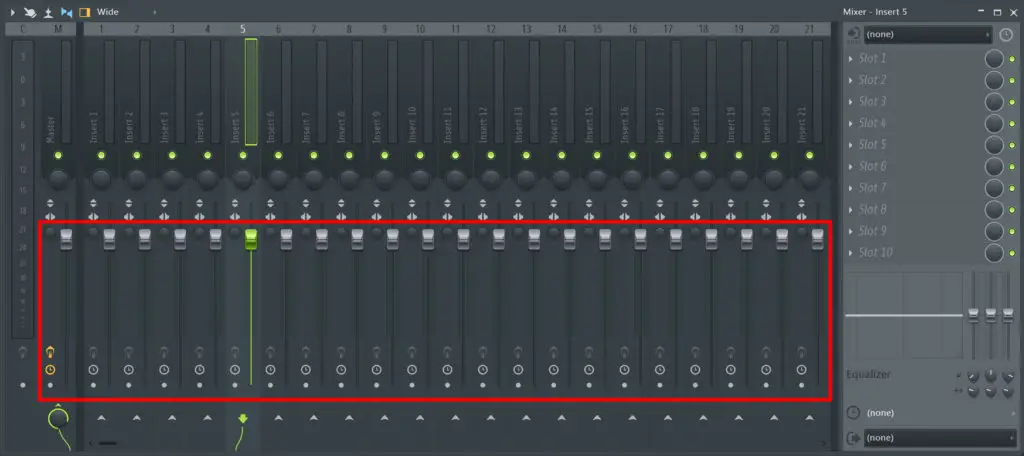
Volume fader
Using this control, you can change the overall volume of your mixer channel, including the volume of any sounds sent to this track, and any added effects within the mixer channel.
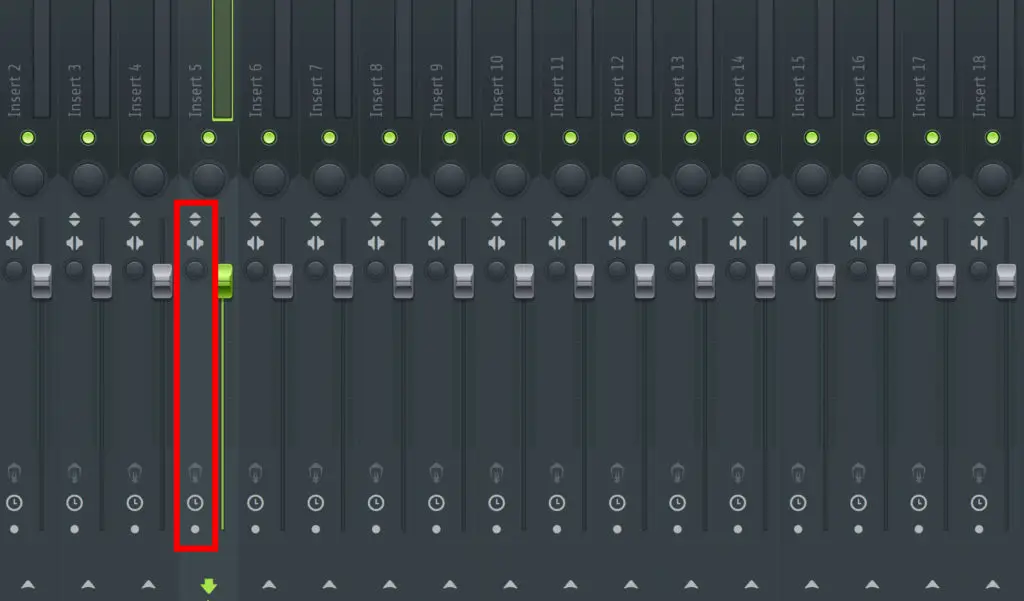
Additional controls
Beside the sliders, there are some options for polarity, switching the left or right channels, and other additional controls. There is also a stereo separation control to make the mixer channel sound more spacious or thinner/more central.
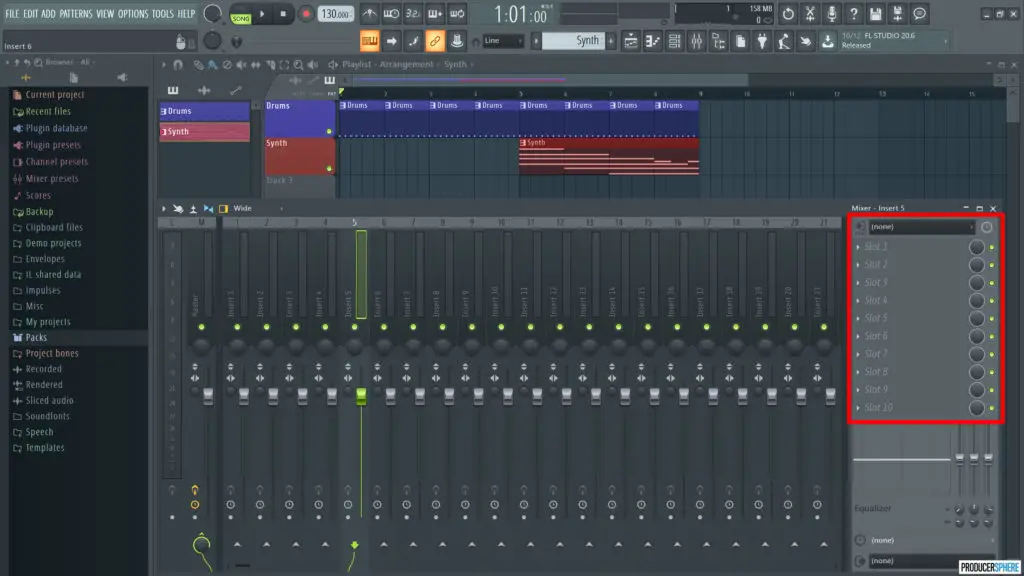
Adding effects to a mixer channel
On the right hand side of the mixer channel, you’ll see 10 effect slots. By selecting one of these slots, and choosing an effect, it will add the selected effect to your mixer channel.
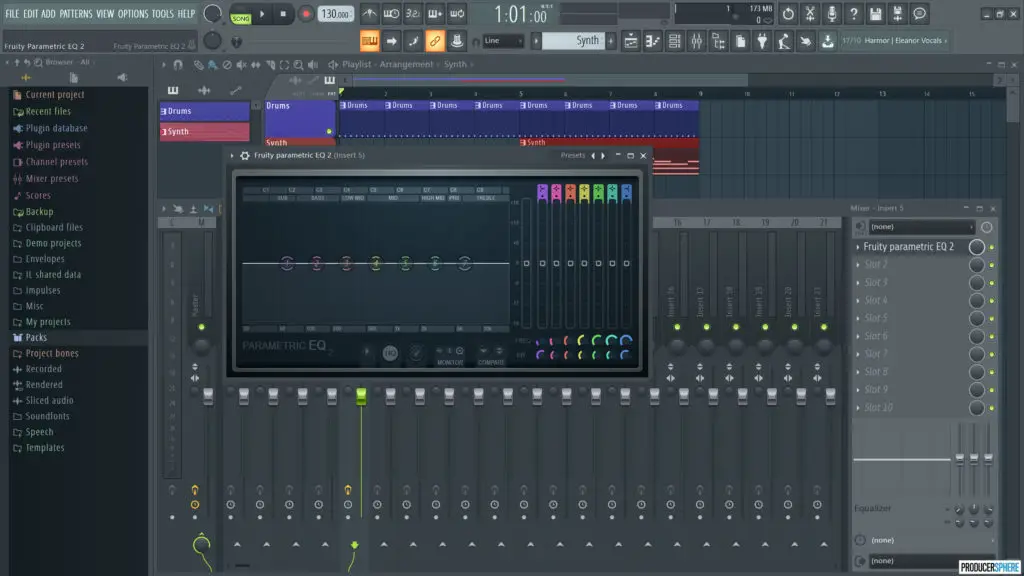
At this point, depending on the effect you’ve added, you can begin to process various effects to enhance and manipulate your sounds. I won’t go any further into this, as there are so many effects you could add, but hopefully you understand the basics of adding an effect to your mixer tracks.
Like I said, if it’s your very first time using FL Studio, don’t focus too heavily on the mixer, just know where it is found and what it is used for.
To conclude…
And there you have it, you should now have a grasp of the basic concepts and functionalities of FL Studio, and can now experiment with creating full, layered songs.
From here, your best course of action would be to take your time, and spend however long it takes to become comfortable with these basics, learning extra tips and tricks along the way from more online guides or Youtube videos.
It’s very likely you’re feeling somewhat overwhelmed at this point, but in time the pieces will start to fit together, and by practising and making mistakes you’ll learn way faster, trust me.
Good luck!