
How to Cut Samples FL Studio 20 – QUICK Tips to Chop Samples (2022)
Chopping, flipping, and rearranging samples is a fundamental part of modern music production, particularly in electronic and hip hop genres.
The ability to use an existing sound and reinvent it within a new track gives you a huge amount of creative potential.
FL Studio is one example of a DAW that makes chopping / cutting samples incredibly fast and intuitive. Using the tips below, you’ll be flipping samples in minutes, using the quickest, most straight forward method there is.
So without further ado, let’s look at how to chop / cut samples in FL Studio 20.
Chopping the sample
The easiest and most common way of chopping or cutting a sample in FL Studio 20 is by using the Slice tool within the playlist view.
First of all, insert your sample into the FL Studio playlist view. This can be done by either locating the file in the left hand browser within FL Studio, or simply dragging and dropping an audio file from your documents into the playlist section.
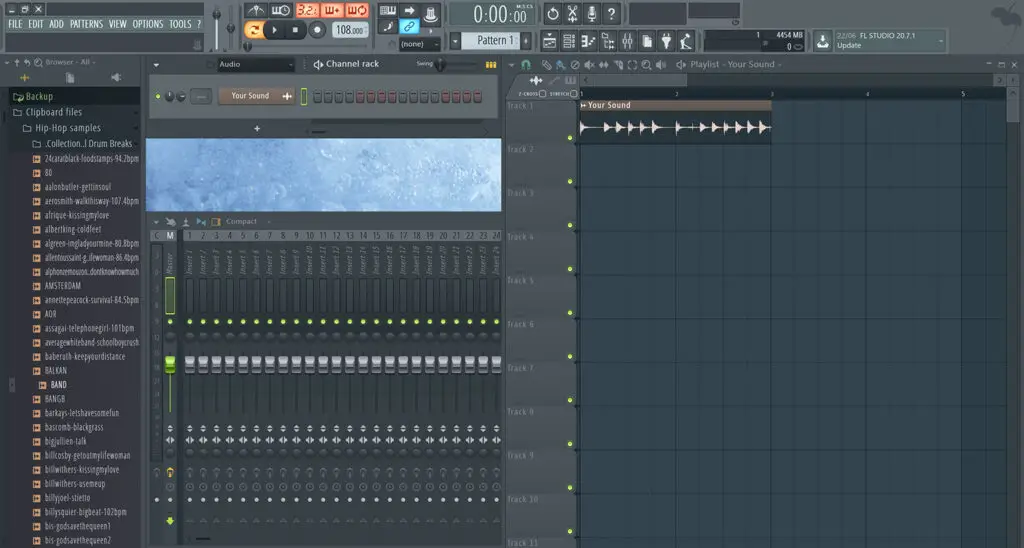
Now you should see your sample in FL Studio like this.
To select Slice, navigate to the small row of icons above the playlist view (highlighted below) and select the Slice option. Your cursor should now look like a tiny razor blade.
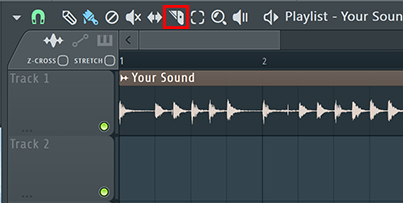
Using this tool, you can now click and drag vertically through the sounds, which will chop the sound into two separate audio segments.
Now, if you navigate back to the Paint tool (the paintbrush icon – found in the same toolbar as the Slice option) you can move the two segments as completely separate “pieces” of audio.
Snapping
One thing that is definitely worth mentioning when it comes to slicing your sounds is FL Studio’s Snap options.
By default, when you click and drag the slice tool around, the blue slice line will “snap” to any line or bar in the playlist.
But what happens if you want to slice a sample that is slightly off the beat?

Navigate to the green horseshoe magnet icon in the mini toolbar and you’ll see a range of snap options. For example, Cell will snap your cursor to any beat in a bar, 1/2 step will snap your cursor to each 1/2 step in a beat, and (none) will remove all snapping so you can freely move your cursor.
Auto-Slicing
One nifty feature in FL Studio for chopping samples is Auto-Slicing.
This feature essentially analyses your sound and automatically slices around individual hits or audio “events”. For example, with a drum sample, Auto-Slicing will attempt to slice around each kick and snare.
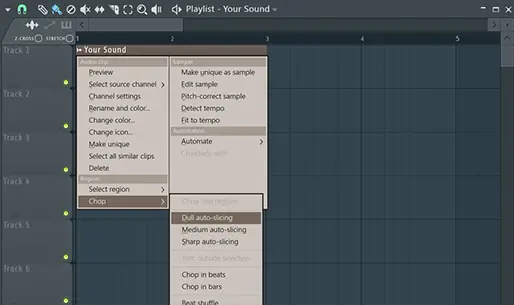
To use this feature, make sure your audio file is already in the playlist view of FL Studio. Then, click the small waveform icon in the top left of the audio file (shown above), and navigate to Chop > Dull Auto-Slicing.
This will create slices of your sound around each drum hit. If you aren’t sampling drums, this feature can be a little hit or miss, and I’d recommend sticking to manually slicing the sounds.
Re-arranging
When you have your slices, you can then re-arrange them to create that “chopped” sound.
An easy way to do this is to select the Paint tool and simply drag the slices around until you have something you like.
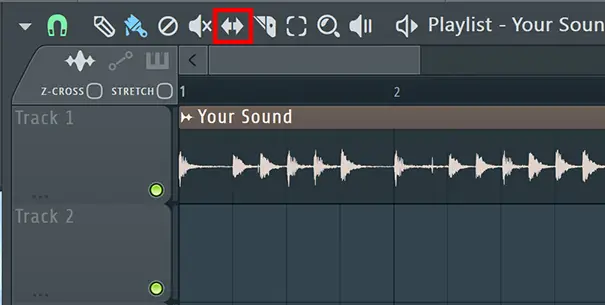
Another way is to select the Slip tool (shown above). Using this tool, you can click and drag within the sound to scroll through the waveform, while the slice stays in the same place in the playlist.
This is very useful for switching out a kick for a snare, or vice versa. It’s also a great method for chopping and screwing vocal samples for that modern electronic vocal sound.

How to Chop Samples – Fl Studio 20: Similar Articles
The 100 Best FREE VST Plugins of All Time
How to make a beat in FL Studio | Step by Step Guide