
10 FL Studio 20 Tips Every Producer Should Know About (2022)

FL Studio is an incredibly popular, versatile DAW (Digital Audio Workstation) and is acclaimed by producers for it’s streamlined workflow, ease of use and additional built-in features. In my opinion, it remains one of the most powerful, innovative music production programs on the market.
This incredible DAW also has A LOT of tricks up it’s sleeve. I’ve been using FL Studio for around 14 years, and I still occasionally find additional tricks and techniques that significantly improve my workflow.
Whether you’re a complete beginner or a more advanced FL Studio user, it’s very likely you’re unaware of some of the tips in this list. If I’d known all these tricks when I was first starting out, it would have saved me a lot of hassle and reduced the initial learning curve significantly.
So without further ado, below are my top 10 tips for FL Studio 20 every producer should know about. These tips will hopefully speed up your workflow in Fl Studio, so you can focus on creating great music.
The video version…
You can either watch this video, or keep scrolling to read more!
Fl Studio 20 Tip #1 – Converting audio into MIDI
If you’re ever in a position where you want to view an audio file in MIDI format, FL Studio makes this very easy for you.
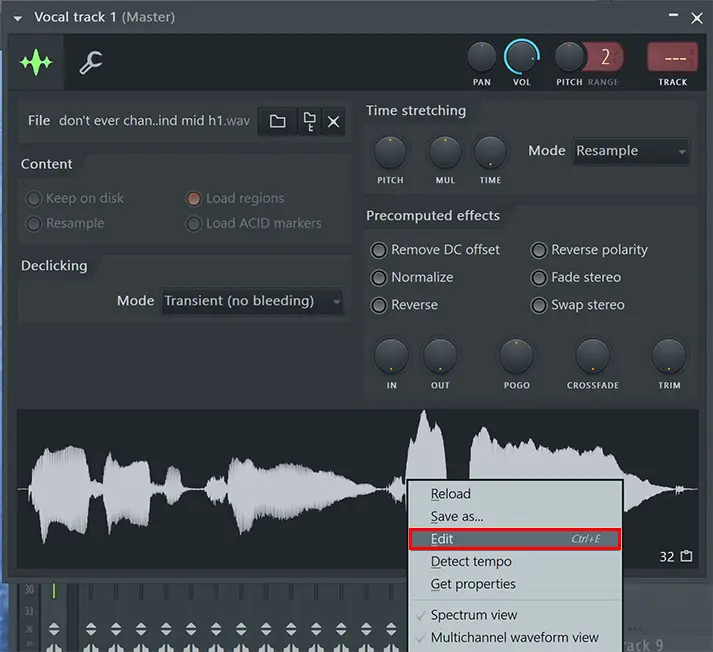
First of all, open up the sample viewer (shown above), right click the waveform view of the sound, and select Edit.
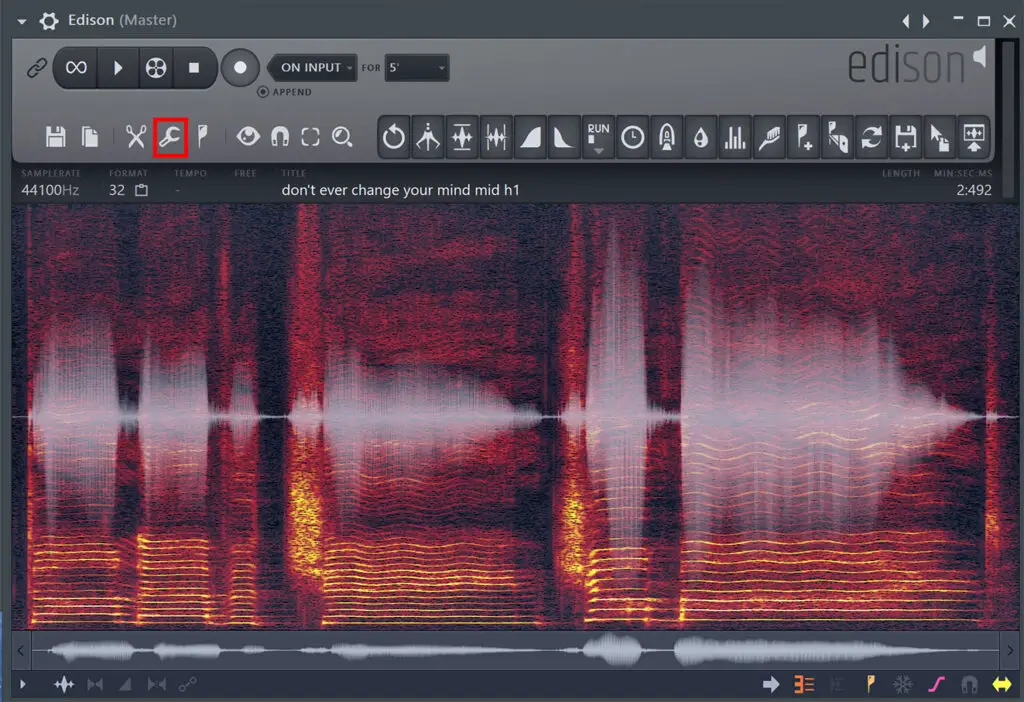
This will bring up the Edison viewer. In this window, click the wrench symbol and select Convert to score and dump to piano roll.
This will create a MIDI representation of the audio file in a new piano roll.
This is especially useful for quickly finding the key of an audio file, or, for example, if you had a vocal melody and wanted to create an replicate synth melody underneath the vocal track.
Fl Studio 20 Tip #2 – CPU-saving techniques
There are two very useful CPU-saving techniques hidden away in the FL Studio menus that you should definitely be aware of. If you often run into CPU issues, overloading issues etc, this one is for you.
Purge unused audio clips – This option will remove all audio files from your FL Studio project that aren’t being used in the playlist, freeing up CPU for other functions. To access this, go to the top menu bar – Tools – Macros – Purge Unused Audio Clips.
Switch smart disable for all plugins – This option will make sure plugins are deactivated while not in use. This really helps with functions such as recording vocals or other live instrumentation, and can drive down that CPU usage.
Fl Studio 20 Tip #3 – Automatic backups every 5 minutes
Please, please make sure you’re backing your projects regularly. If you’re a seasoned producer, I shouldn’t have to tell you this, but as a beginner you need to understand that things can and will go wrong. If you’re not backing up your files, you could literally lose hours of works because FL Studio decides to crash at the worst moment.
To make FL Studio backup your files automatically , go to the to top menu bar and navigate to File Settings. Then under Backup, and set to Frequently – every 5mins & before risky operations. This is very useful if you mess up and need to revert to how the project was 5 minutes prior.
Fl Studio 20 Tip #4 – Copy Automation State
This is an example of something I was doing wrong for years, and knowing this earlier would have saved me so many headaches.
If you have an automation clip in FL Studio, and want to copy that automation pattern onto another automation path, there’s a very easy way to do that. Let’s say you have a volume fade out automation clip for a synth, and you want that same exact automation pattern for a reverb for a separate piano sound, you can easily copy the automation pattern across.
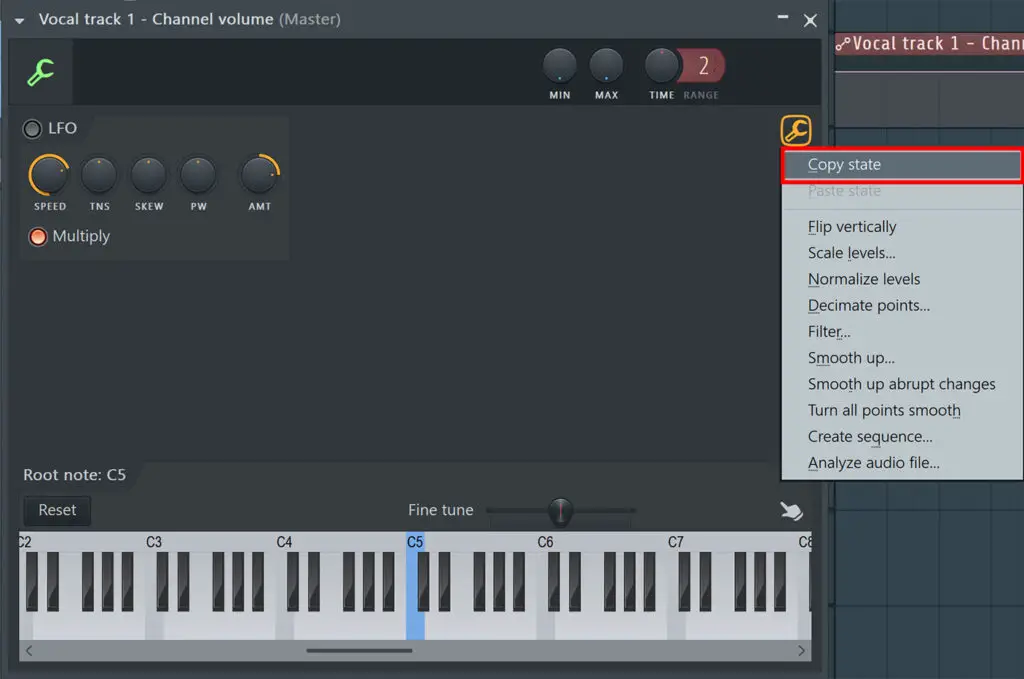
To do this, double click on the automation clip within your playlist. This will open up the automation channel window. Navigate to the wrench on the right of the window, and select Copy state.
Next, double click on the automation clip you want to copy the pattern to, navigate to the wrench and hit Paste state.
Fl Studio 20 Tip #5 – Duplicate Mixer Channel State
If you have a mixer channel with various effect plugins, and want to duplicate these effects to another channel instantly, there’s a really neat way to do this.
Simply right-click on the mixer channel you want to duplicate, and left-click+hold Save mixer track state as… Now, drag this option onto any mixer channel and all your plugins and settings will be duplicated onto the mixer channel.
Fl Studio 20 Tip #6 – Multichannel waveform view
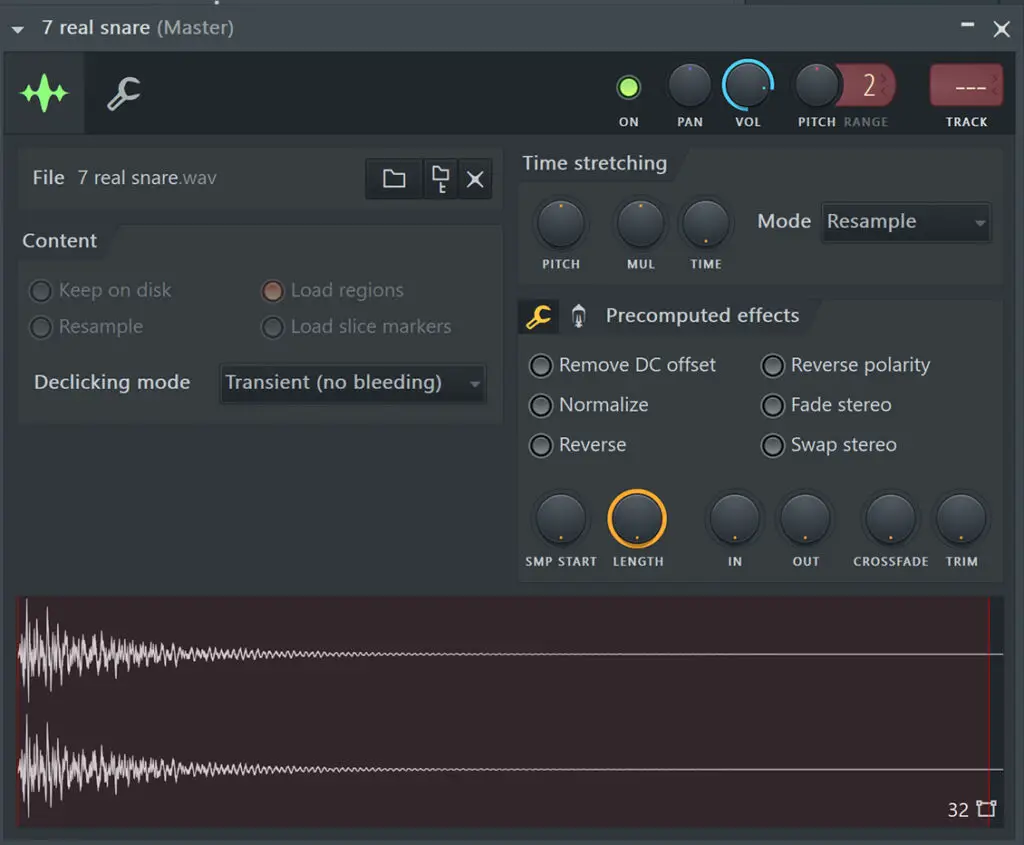
Occasionally, it can be useful to view your audio files in FL Studio in multichannel waveform view. This shows the waveform split into left and right input signals, as shown below.
Viewing your sounds in multichannel waveform view is especially useful when a sounds stereo input varies between the left and right channels.
To do this, double click a sound. This will open up the audio file’s viewer window (shown above). Then right-click the waveform, and select Multichannel waveform view. You’ll now notice the sound is shown as two separate waveforms in the playlist view.
Fl Studio 20 Tip #7 – Dump score log
FL Studio, technically speaking, is always recording your MIDI patterns. If you play something on a MIDI controller or keyboard that you really like, but you weren’t recording to the piano roll, you can easily retrieve that pattern from FL Studio’s “Score Log”.
In the top menu bar, go to Tools and select Dump score log to selected pattern. This will add your unrecorded melodies or MIDI sequences to the piano roll, which is an incredibly useful feature.
Fl Studio 20 Tip #8 – Never automate the mixer faders
As a general rule, you should NEVER automate the mixer channel main faders.
Why? If there is an automation clip on a mixer fader, it becomes very difficult to make small adjustments to the fader value without having to create new automation clips. Also, this can really mess things up if you’re using a MIDI controller that controls these faders.
A much more effective way to automate a mixer channel volume is to add a simple volume or level plugin to the last effect slot of the mixer channel (Fruity PanOMatic is a good example). Then automate the volume inside this plugin, keeping the mixer volume fader free from pesky automation.
Fl Studio 20 Tip #9 – Auto dull-slicing
Fl Studio allows you to automatically slice a sample based on the transient information of the sound. This technique works particularly well on drums or percussion samples, and will usually separate out the prominent drum hits in the sample.
To do this, click the waveform icon in the top left of your sound (in the playlist view, shown above) and navigate to Chop. Here you can choose Dull auto-slicing, Medium auto-slicing or Sharp auto-slicing.
Fl Studio 20 Tip #10 – Cut itself option
This option is fantastic if you want to sequence a MIDI melody, but don’t want each note to overlap. Using the Cut Itself option, when another note is played in the piano roll, the previous sound will stop. This is great for sounds such as 808’s, which sound pretty terrible when they overlap.
To do this, right-click on the sound in the channel rack, and select Cut Itself.

FL Studio 20 Tips: Similar Articles
The Best FL Studio De Esser Plugins
How to make a beat in FL Studio